
Appearance
Gumlet (Pro)
Gumlet is a professional video hosting and streaming platform that handles video optimization, processing, and global delivery. FluentPlayer Pro includes a full Gumlet integration, allowing you to connect your Gumlet account, browse your video libraries, and use secure signed URLs for protected video playback directly within WordPress.
Pro feature
Gumlet is available only with FluentPlayer Pro. Install and activate the free FluentPlayer plugin first, then activate Pro.
Why Use Gumlet?
- Adaptive HLS Streaming: Gumlet automatically optimizes and encodes your uploaded videos into multiple resolutions, delivering smooth playback based on the viewer's network speed.
- Secure Video Delivery: Protect your premium content from unauthorized sharing and hotlinking by enabling secure signed URLs for private or protected video playback.
- Seamless Media Management: Browse, list, and select videos from your existing Gumlet collections directly within the WordPress dashboard.
Configure the Gumlet
1. Generate an API Key in Gumlet
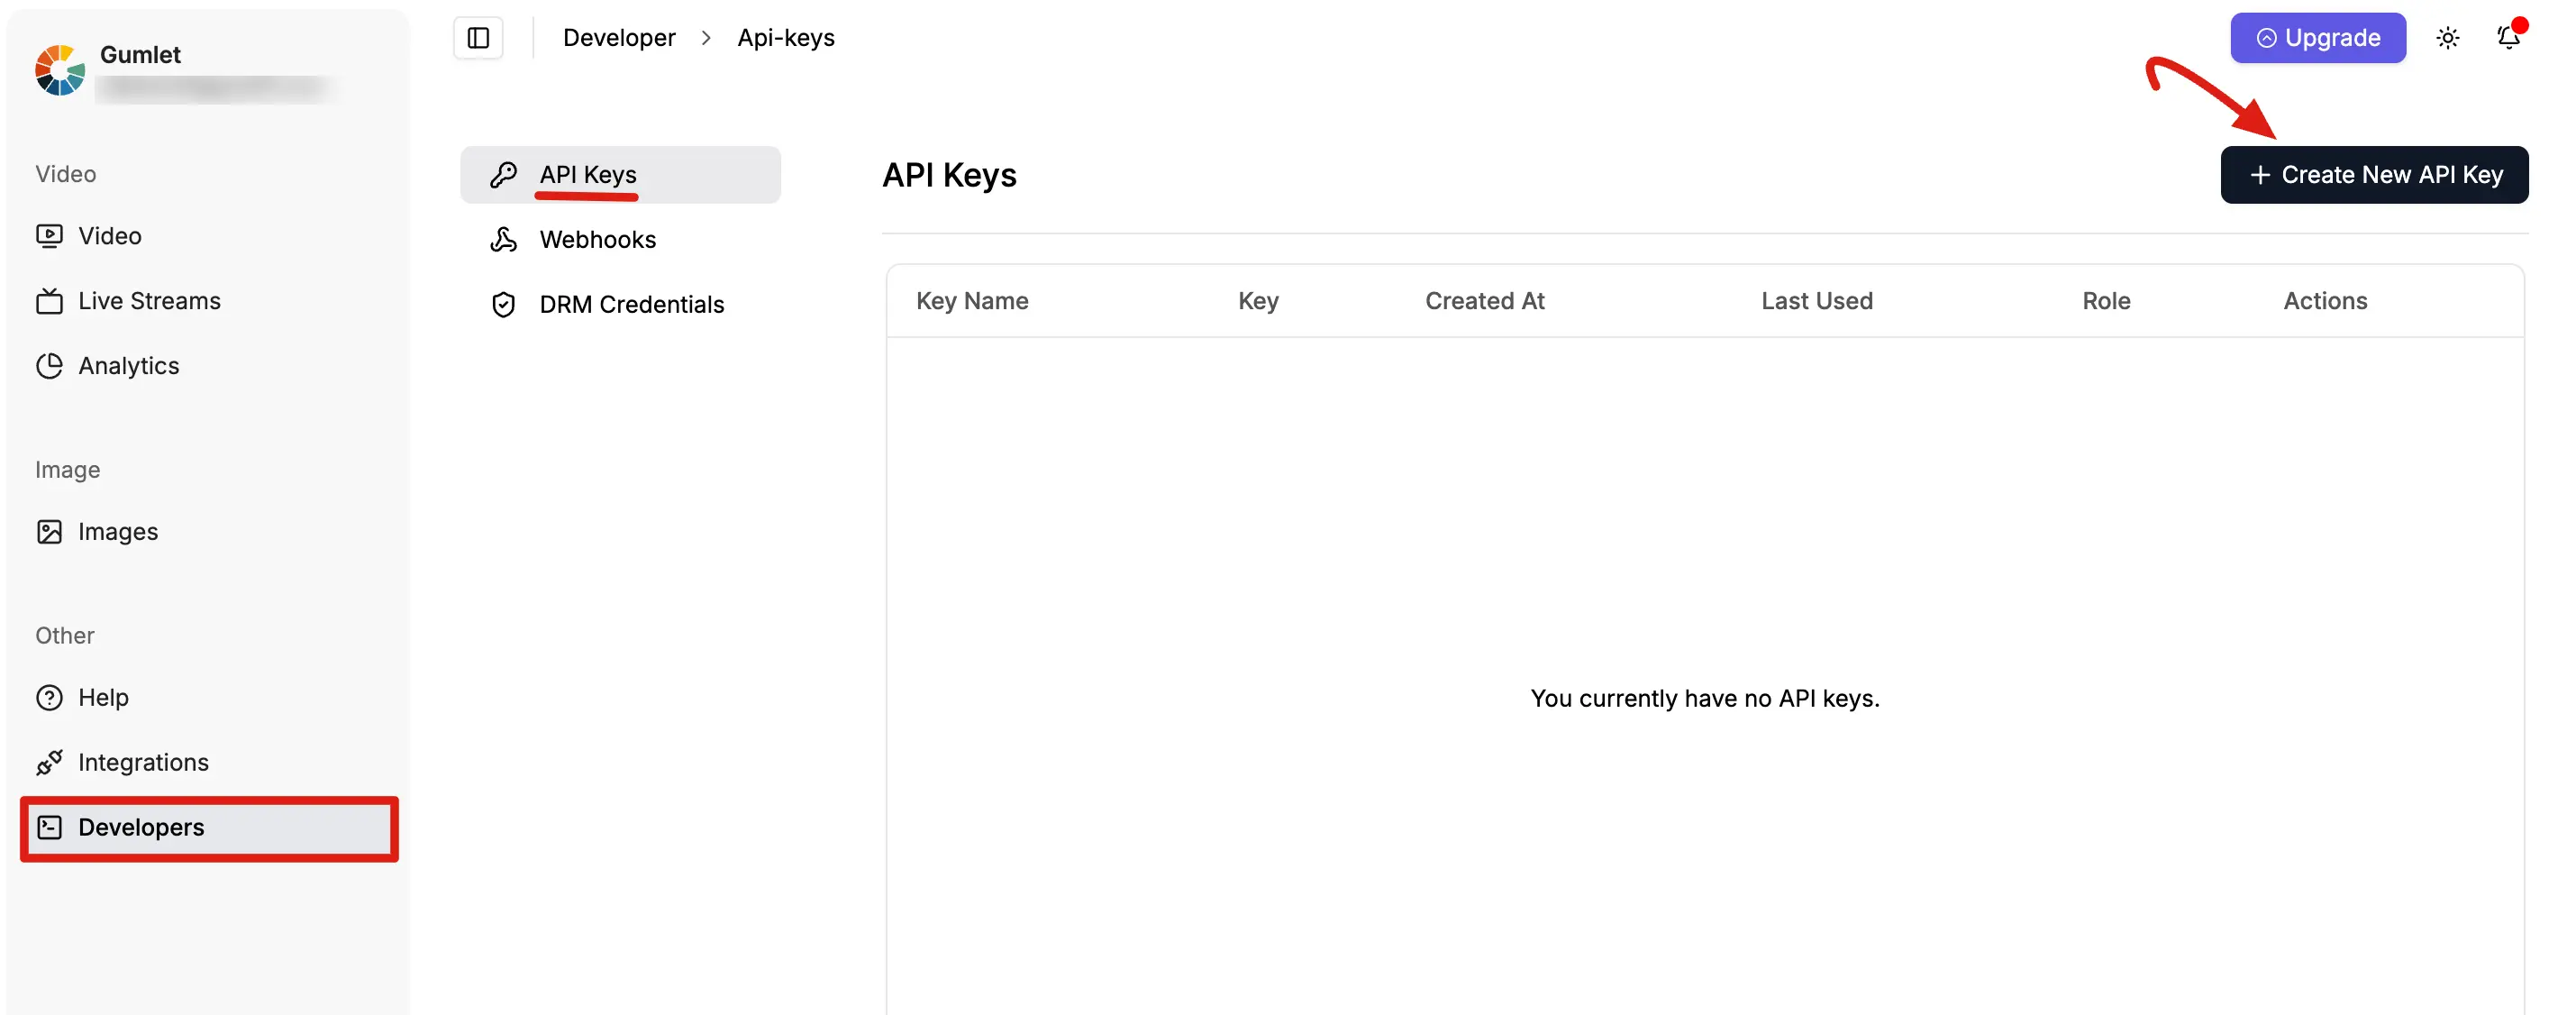
- Log in to your Gumlet dashboard and click Developers in the left sidebar.
- Select the API Keys tab and click + Create New API Key.
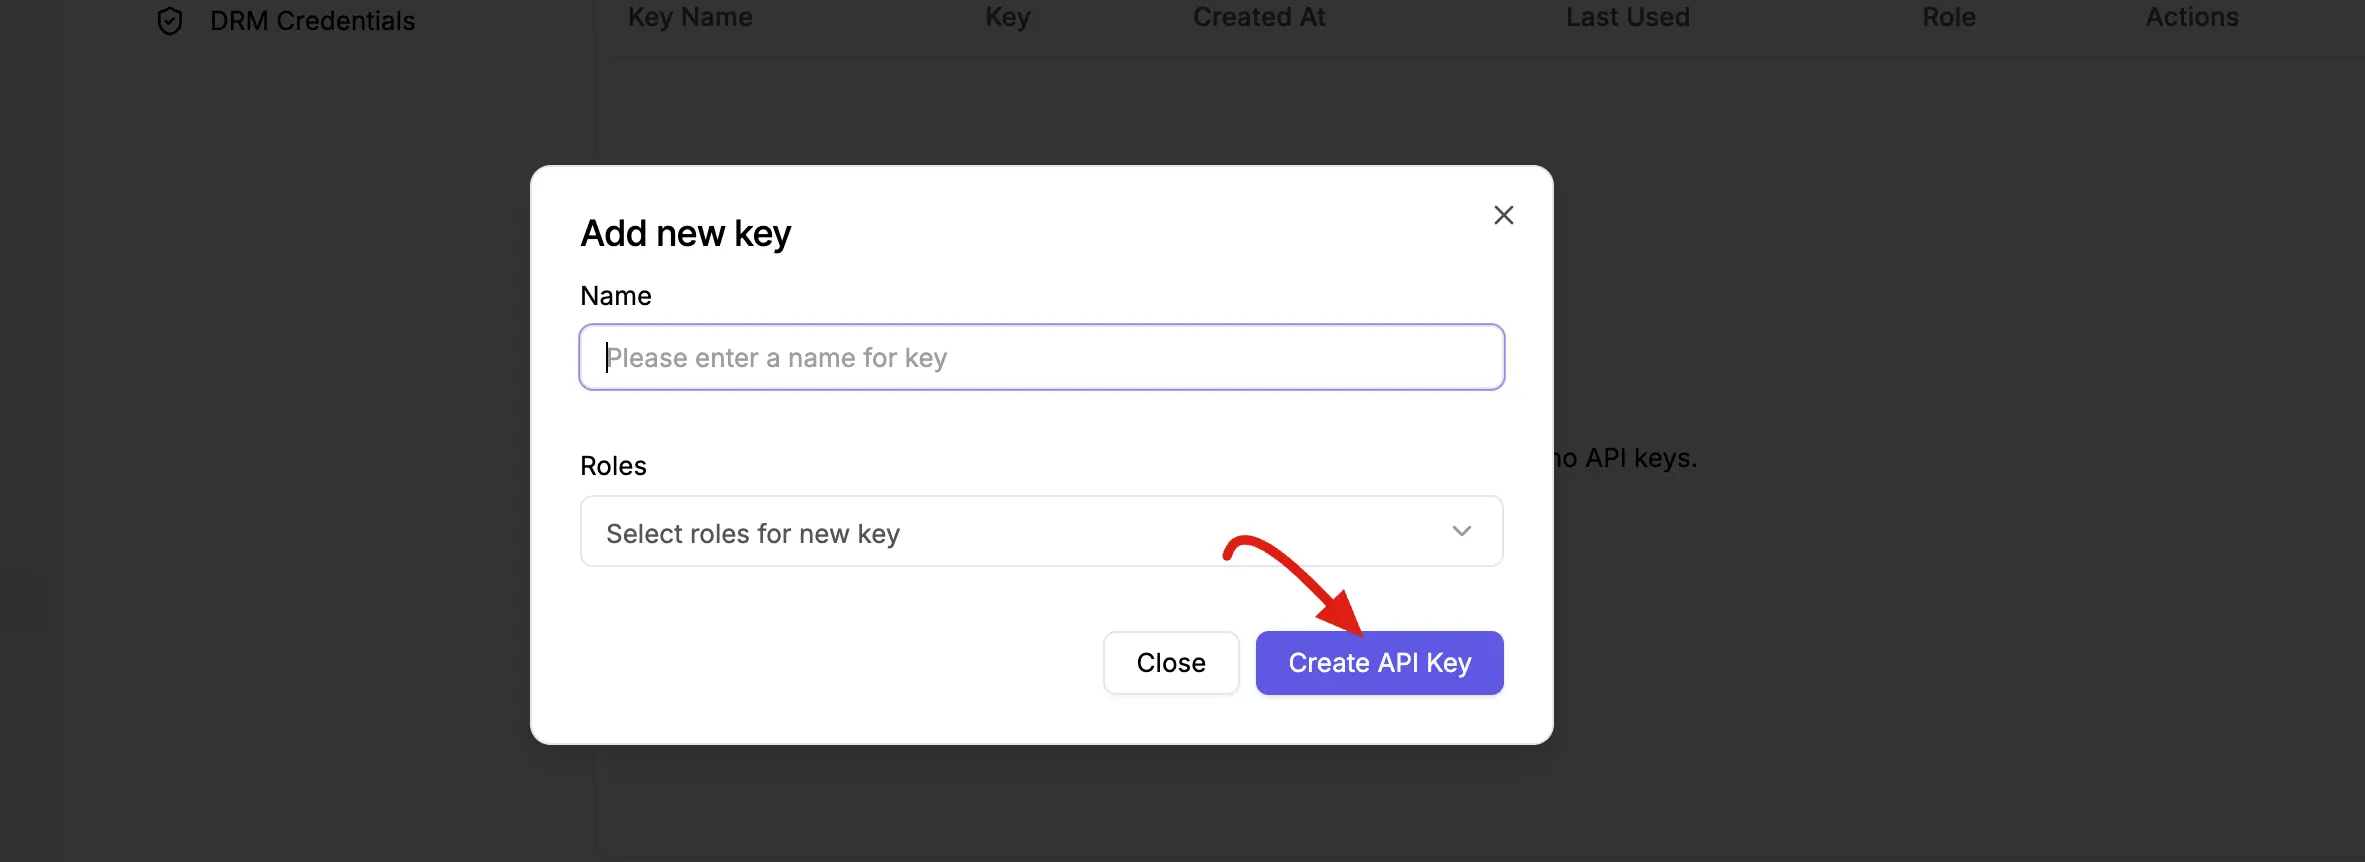
- Provide a descriptive Name for your key (for example, "FluentPlayer Integration").
- Under Roles, select Video Admin along with any other roles needed to manage your assets. Choose your workspace and click Create API Key.
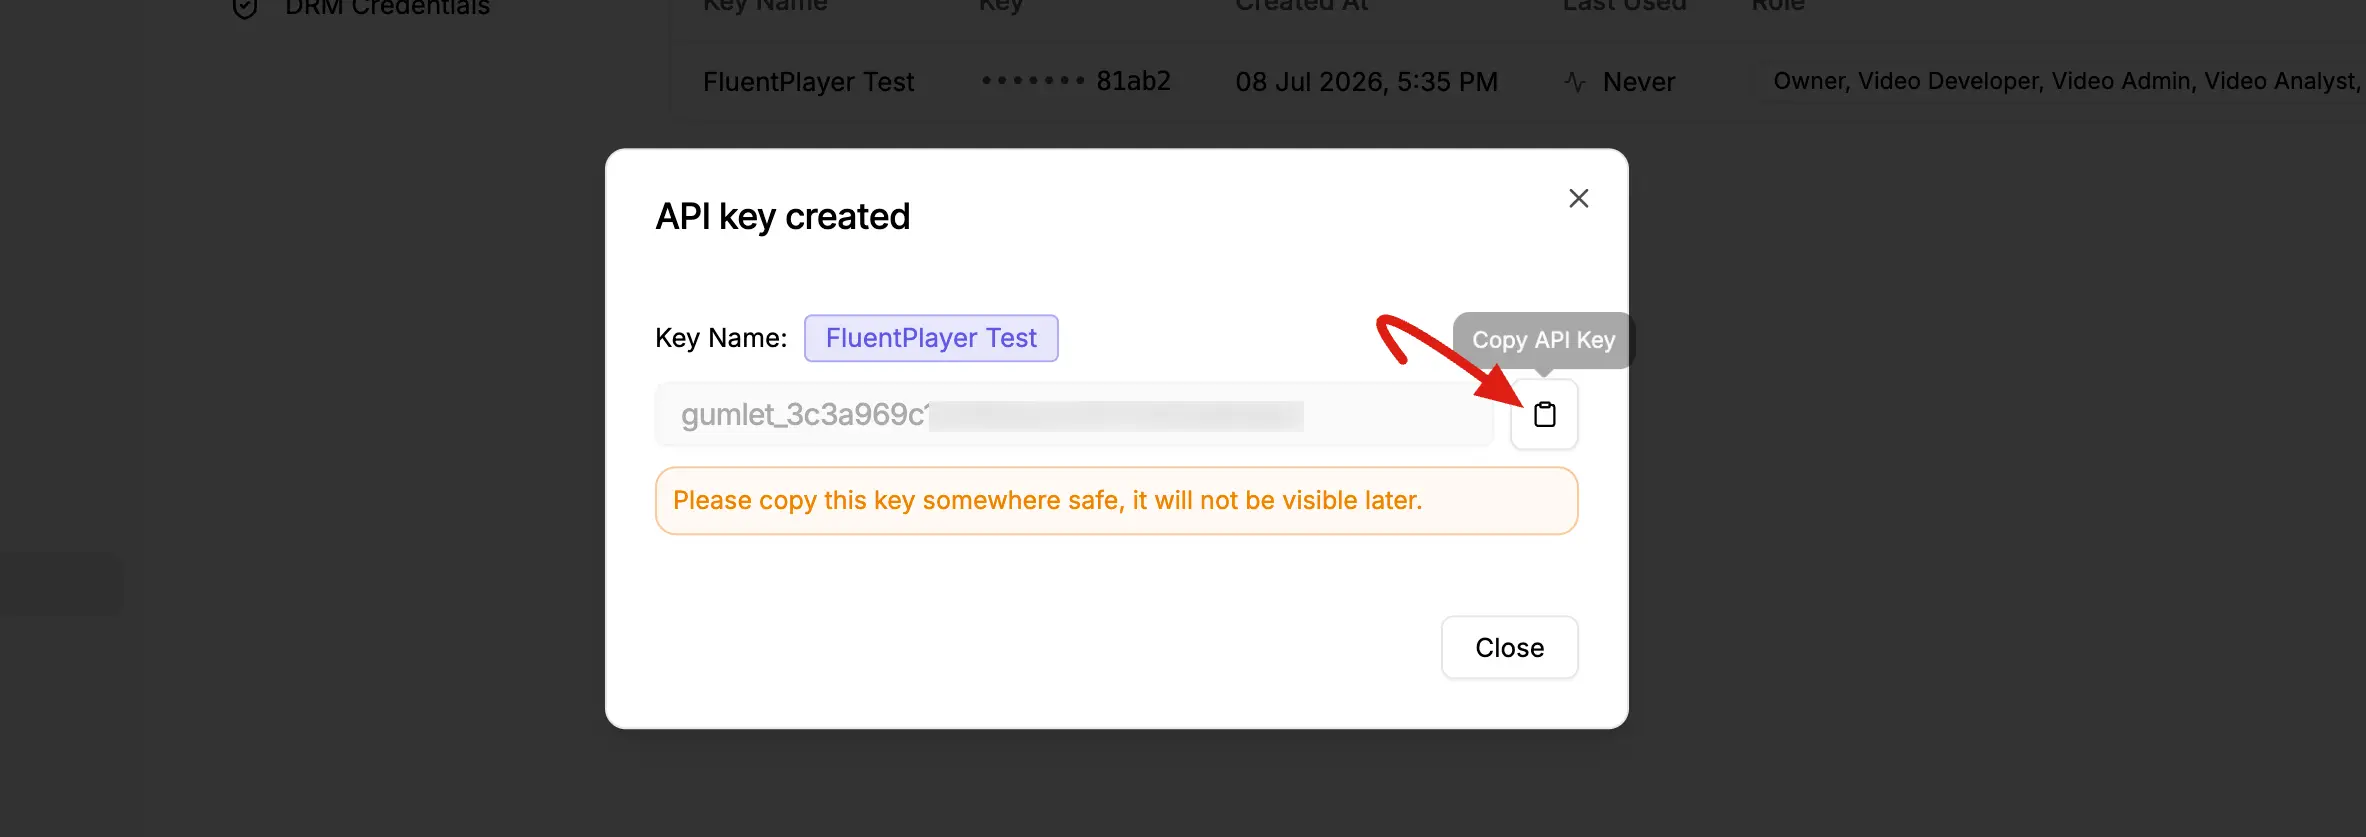
- Copy the generated API key immediately and store it somewhere safe it will not be shown again.
WARNING
When creating the API key, you must assign the Video Admin role. Without it, the connection test will fail and FluentPlayer will be unable to list or fetch your library assets.
2. Copy Your Collection ID
- Navigate to the Video Library or Workspaces section in your Gumlet dashboard.
- Open the specific video collection you want to use.
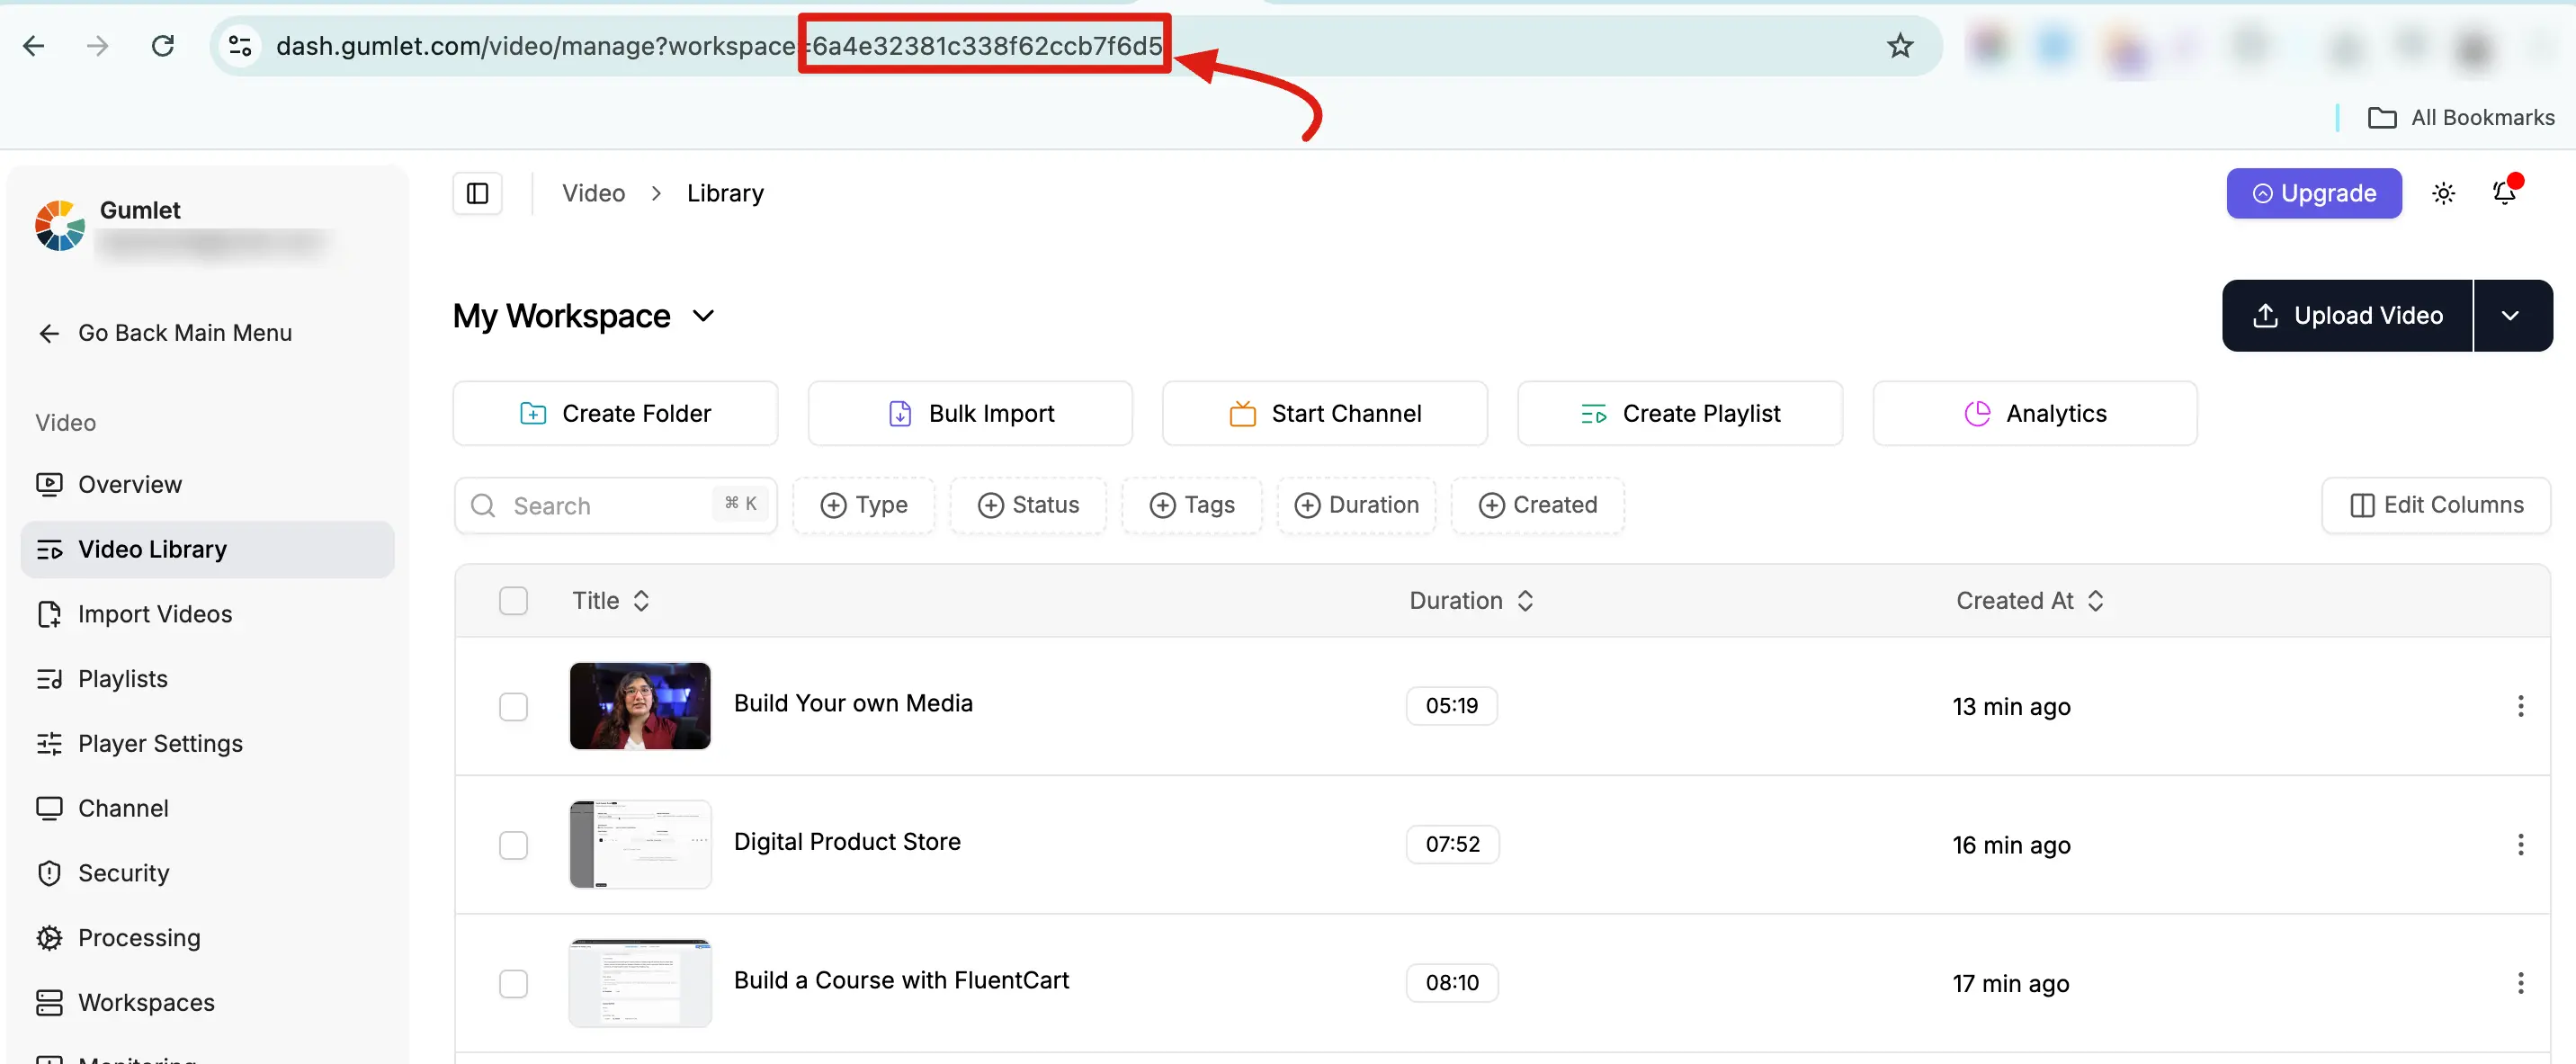
- Copy the Collection ID from the browser URL bar it appears right after the
/workspace/path segment.
3. Connect Gumlet to FluentPlayer Pro
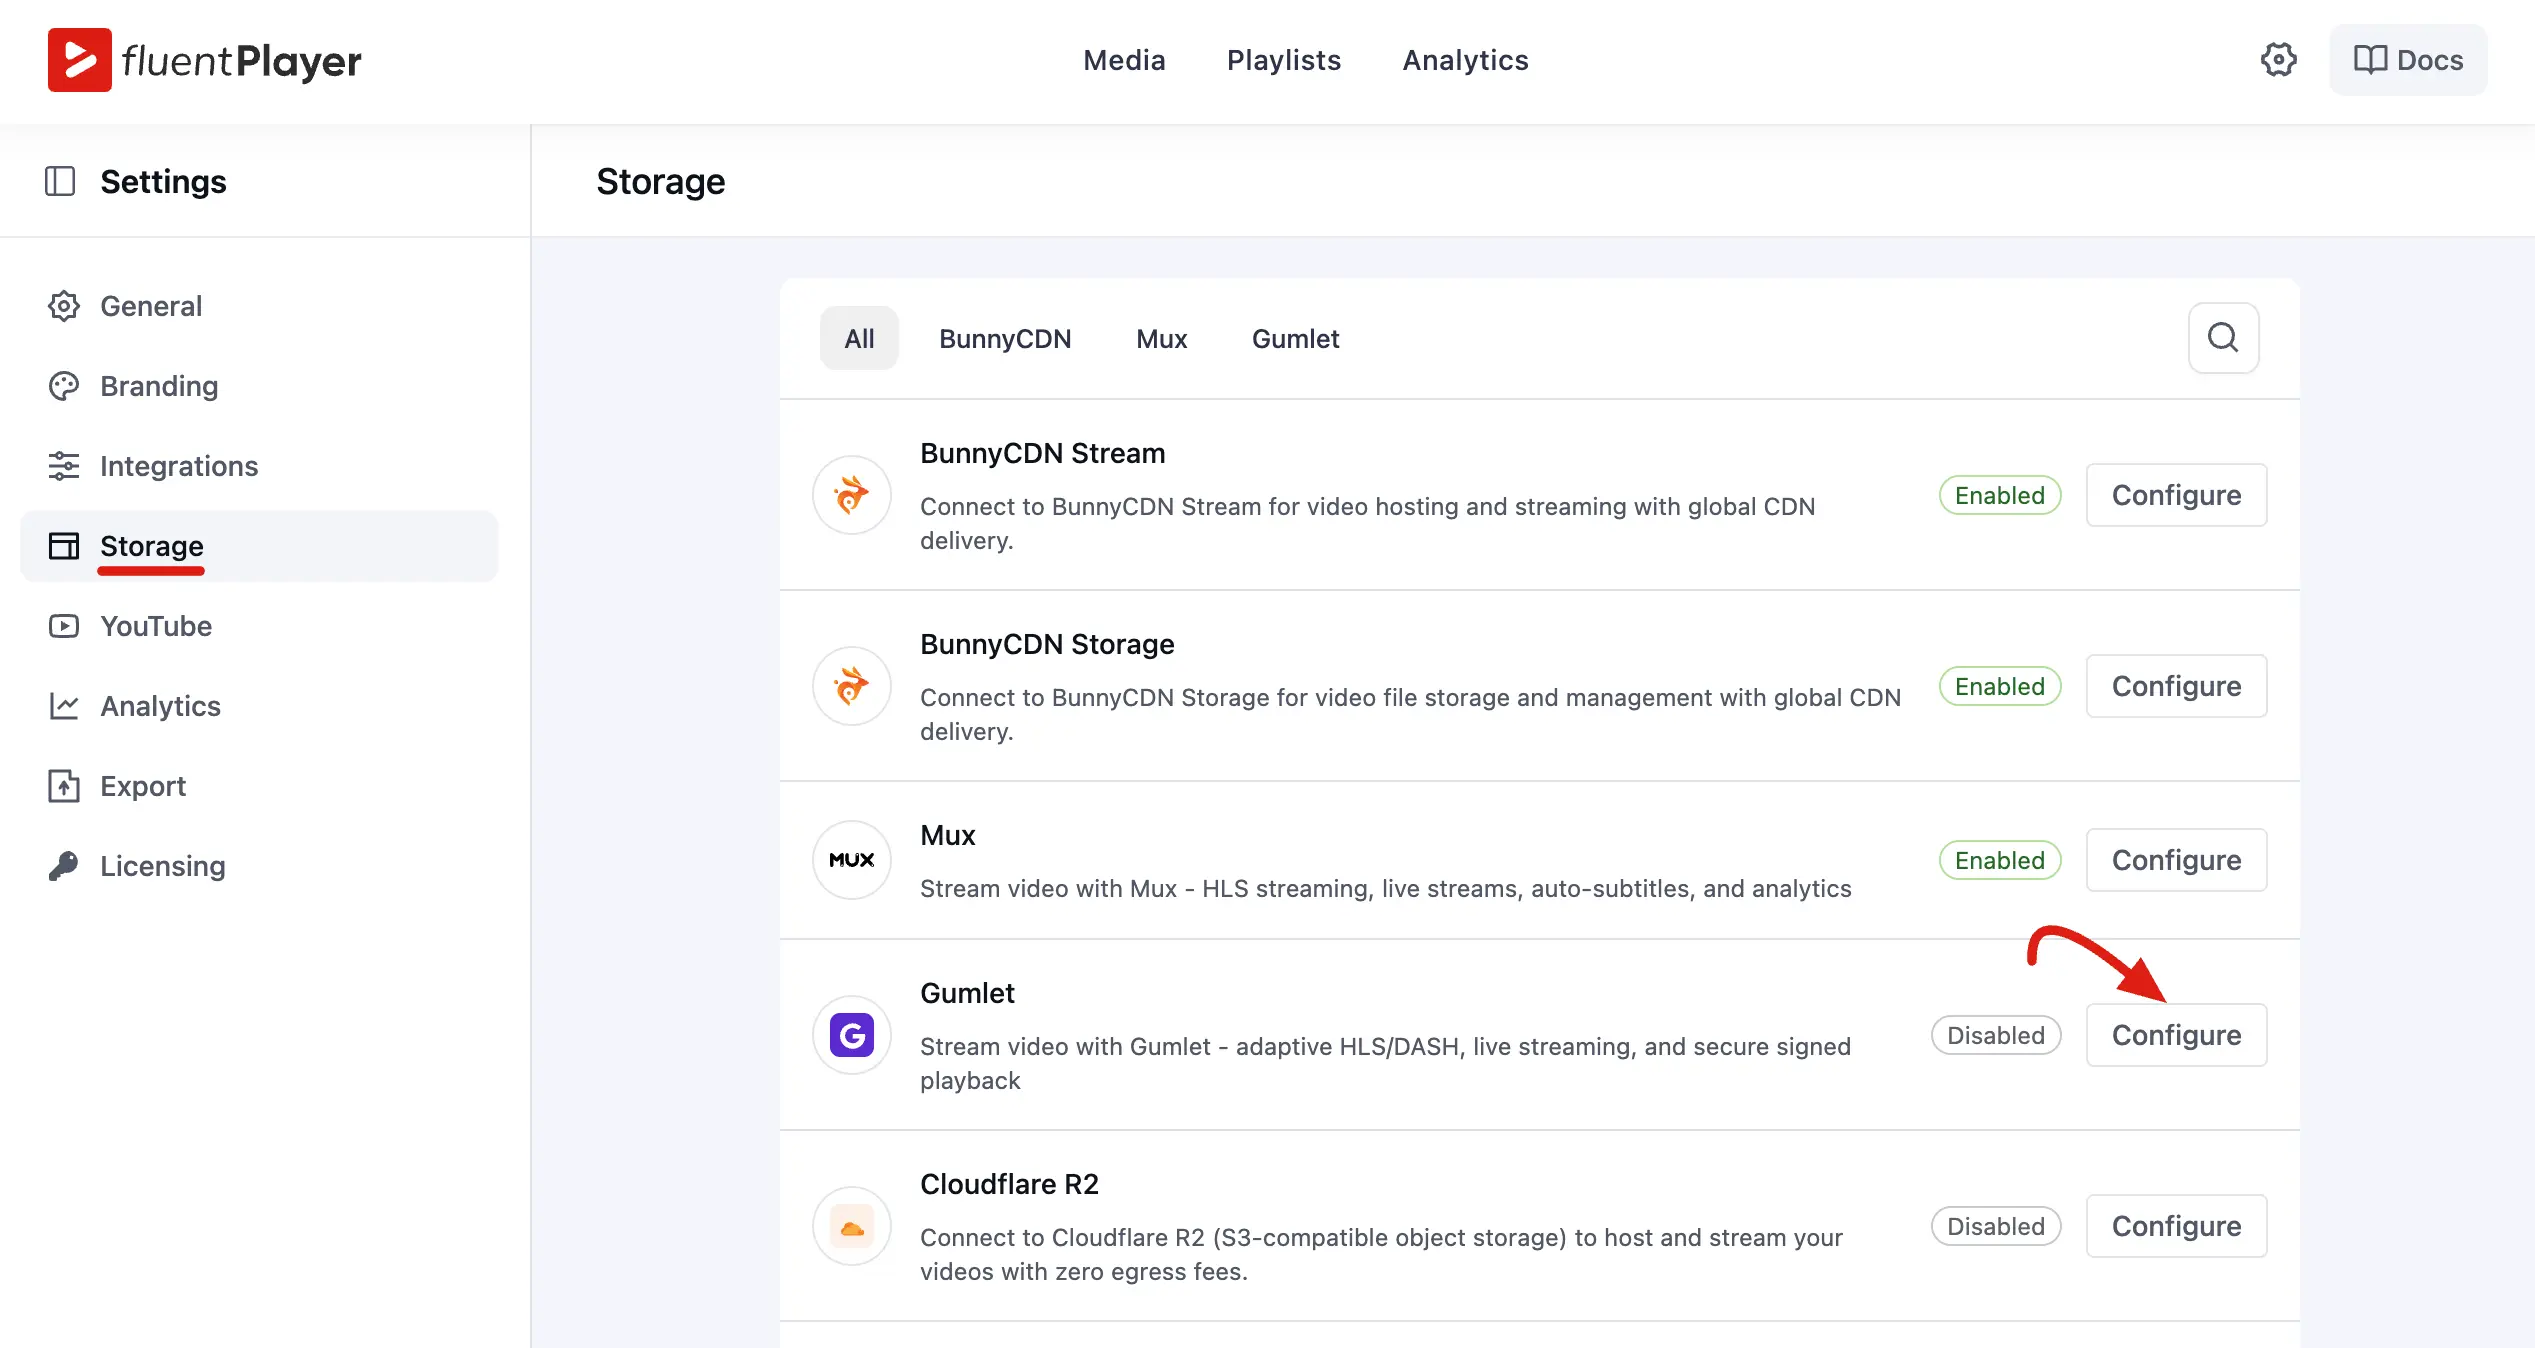
- In your WordPress admin, go to FluentPlayer Pro → Settings → Storage.
- Locate the Gumlet card and click Configure.
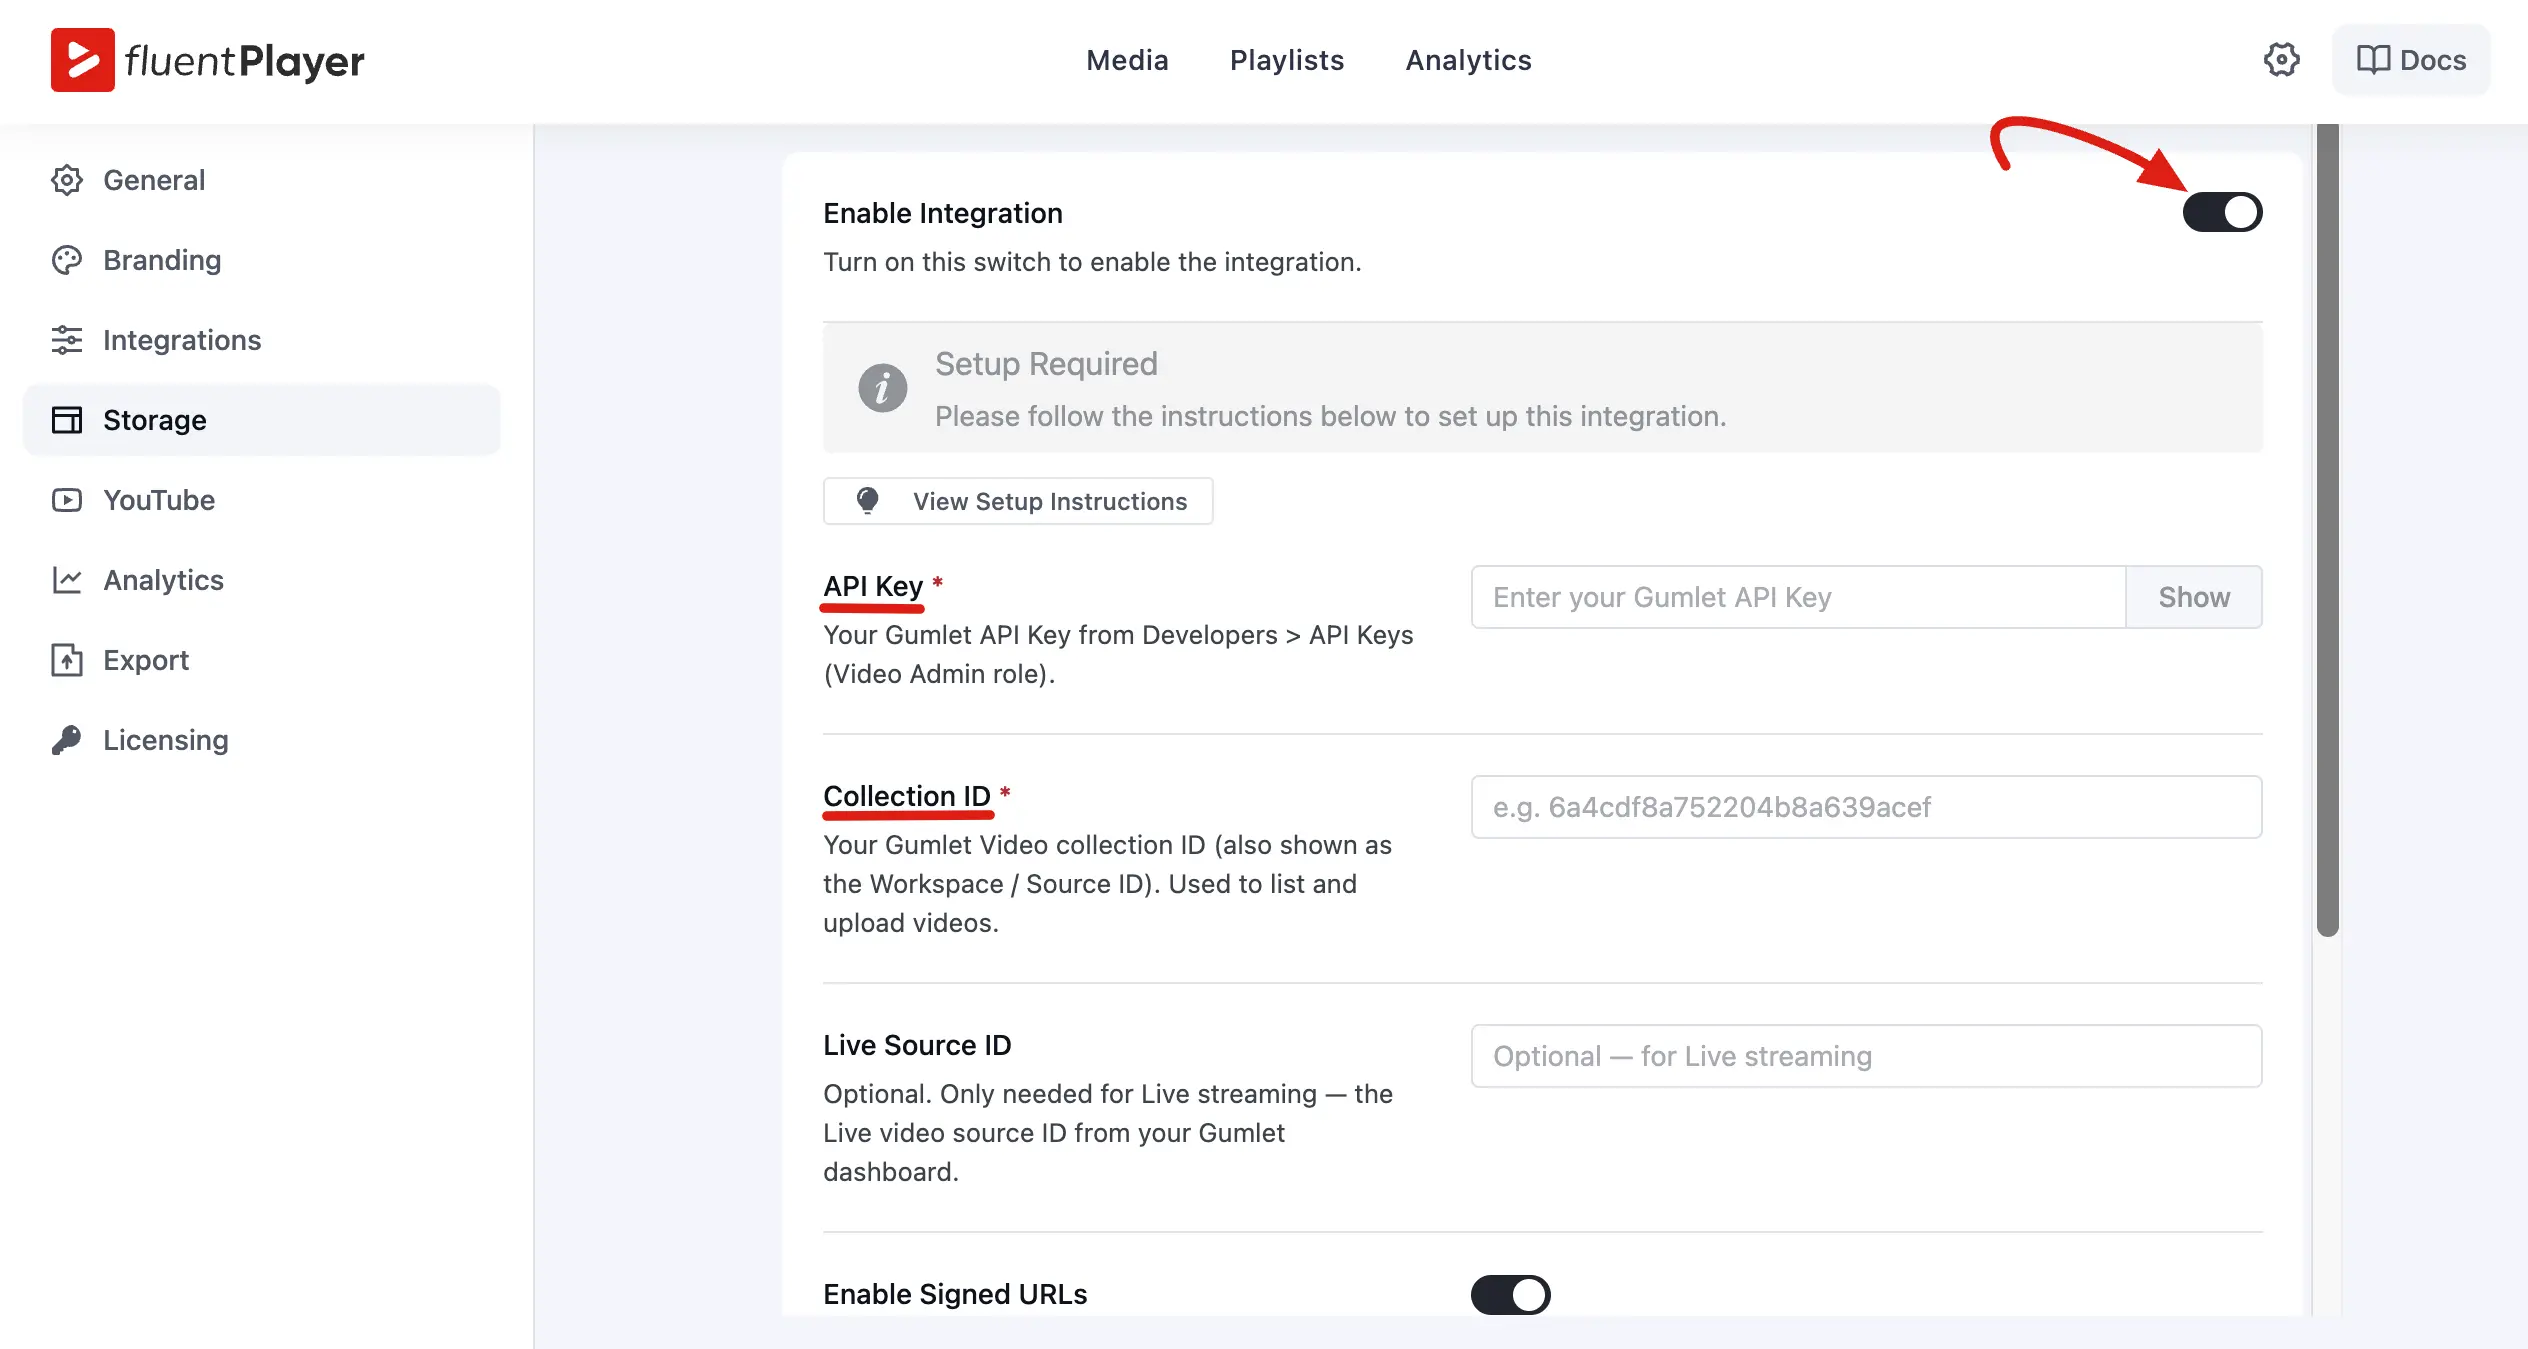
- Toggle on Enable Integration to reveal the configuration fields.
- Paste your API Key into the API Key field.
- Paste your Collection ID (also called the Workspace / Source ID) into the Collection ID field.
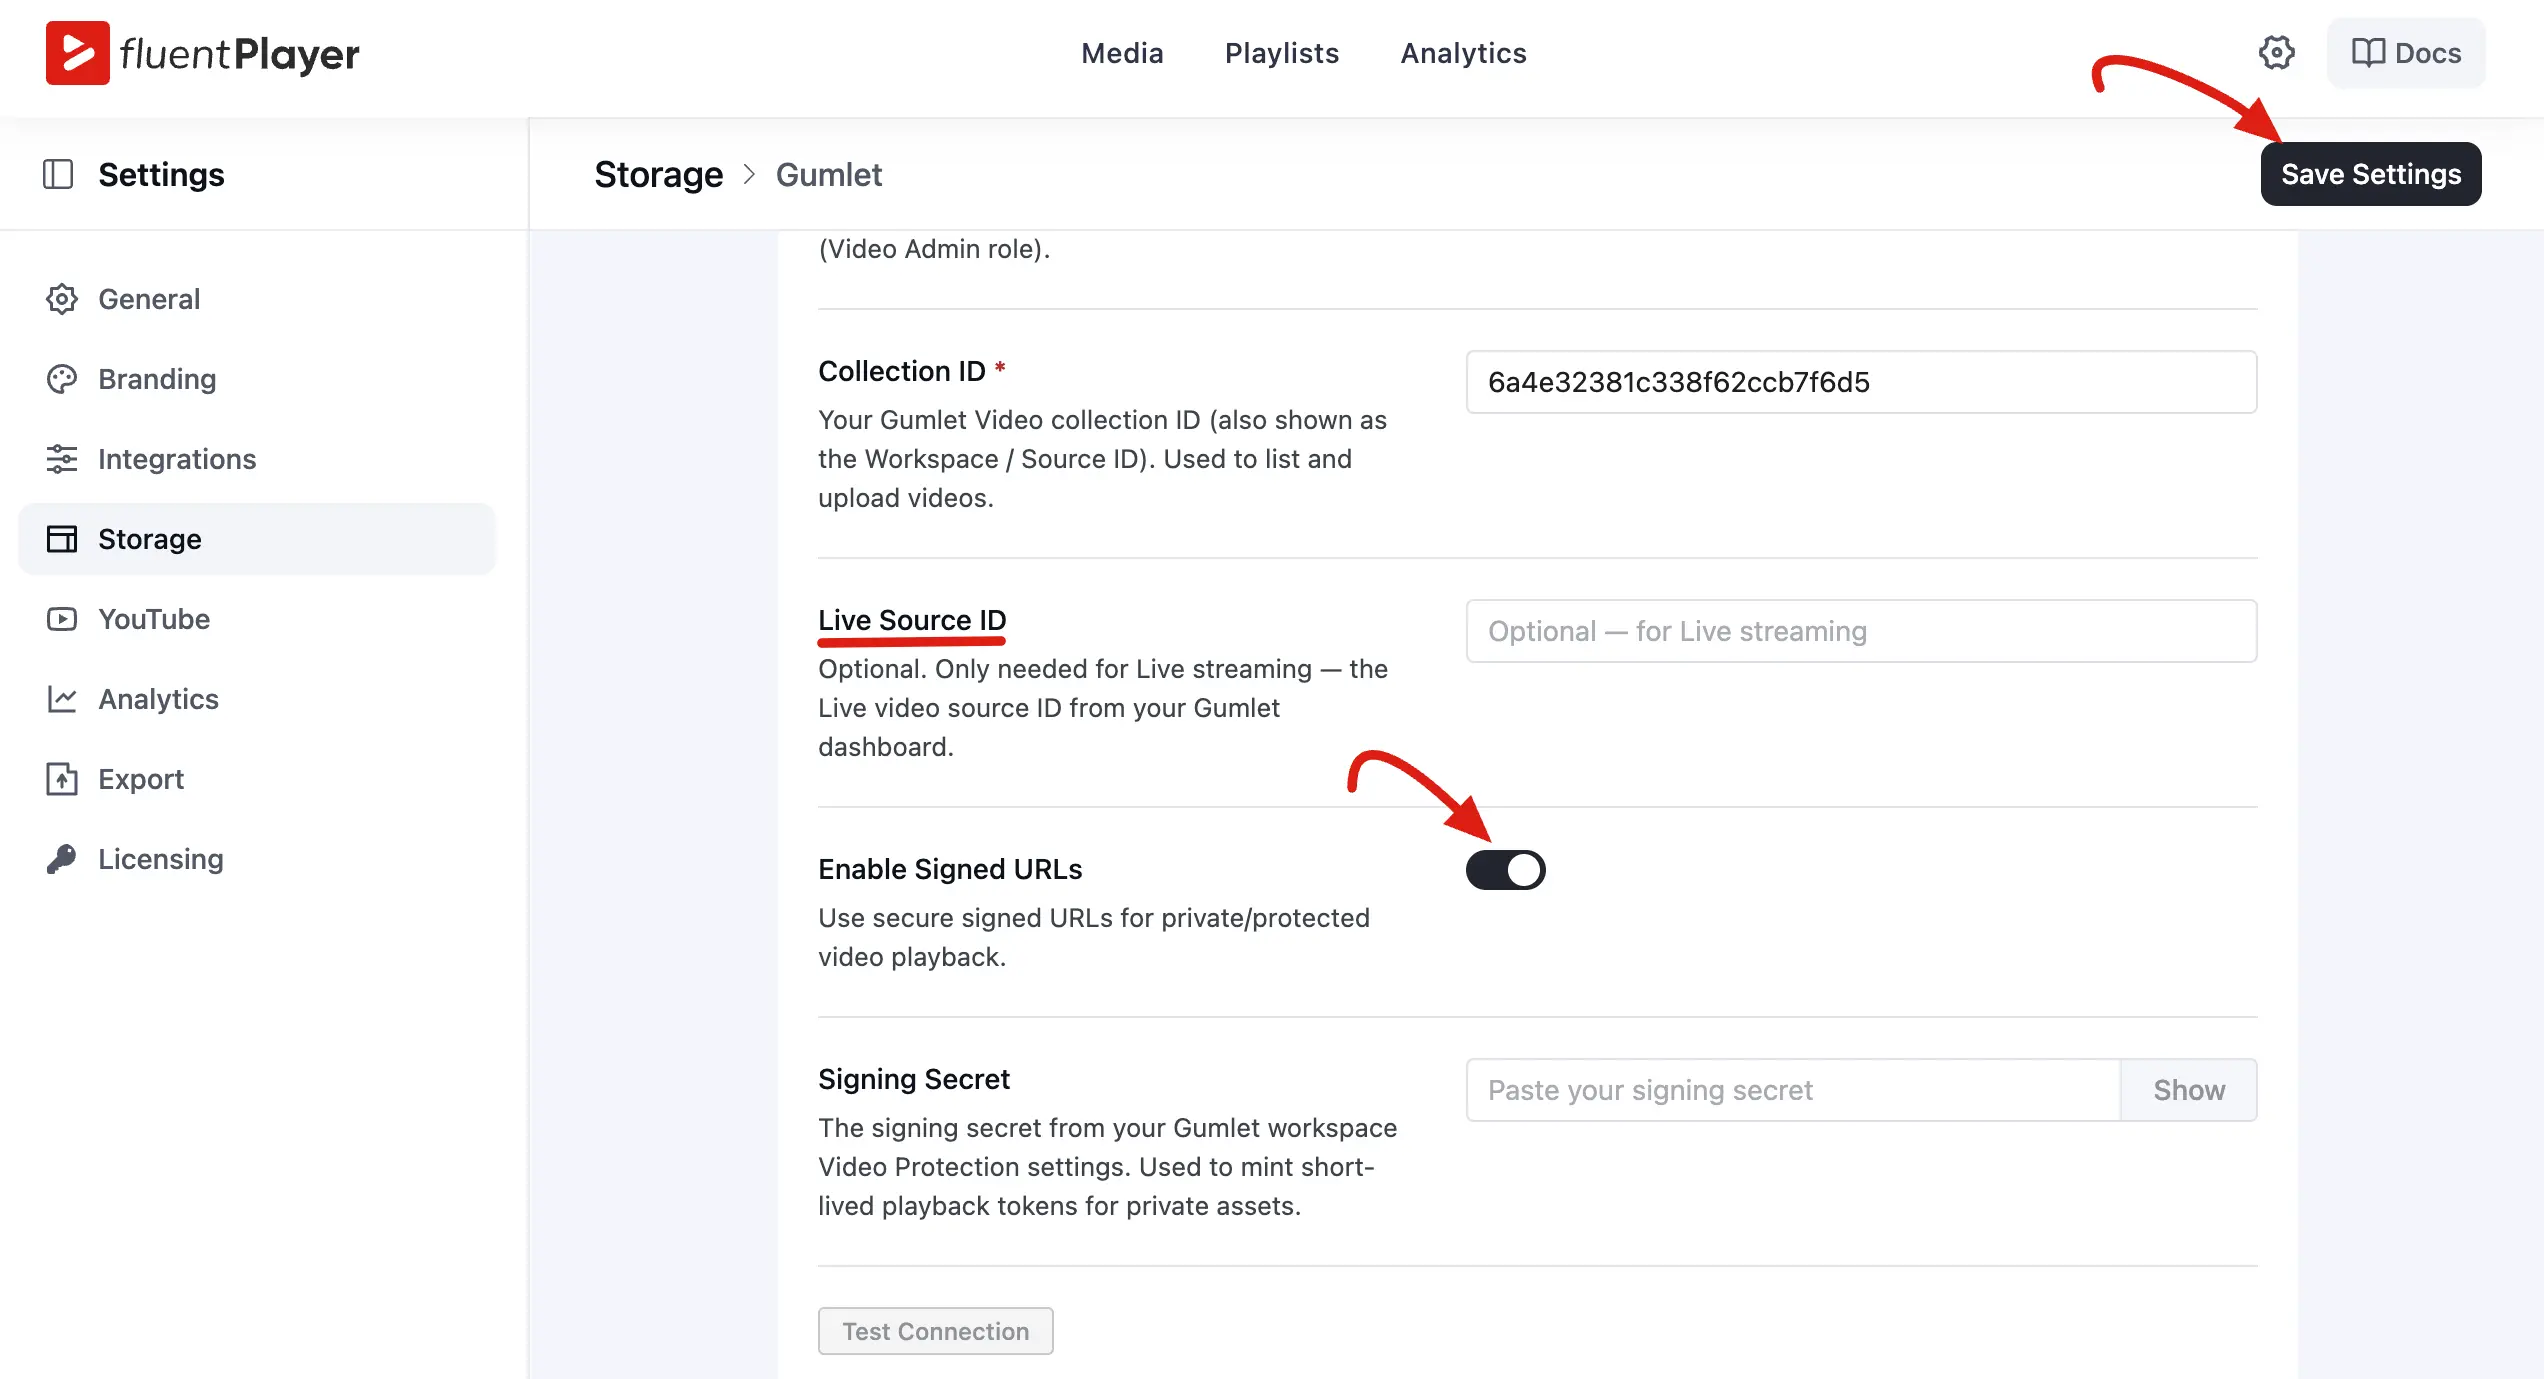
- Live Source ID (Optional): If you manage live streams, enter your Live Source ID from the Gumlet dashboard.
- Click Save Settings to finalize the connection.
4. Configure Secure Playback (Optional)
To protect your video streams with signed URLs:
- Enable the Enable Signed URLs toggle.
- Paste your workspace Signing Secret found in your Gumlet workspace Video Protection settings into the Signing Secret field. FluentPlayer uses this to generate secure, short-lived playback tokens.
TIP
Signed URLs are the recommended way to prevent hotlinking and unauthorized sharing of premium video content. Enable them for any video you want to restrict to logged-in or paying users.
Use Gumlet as a Video Source
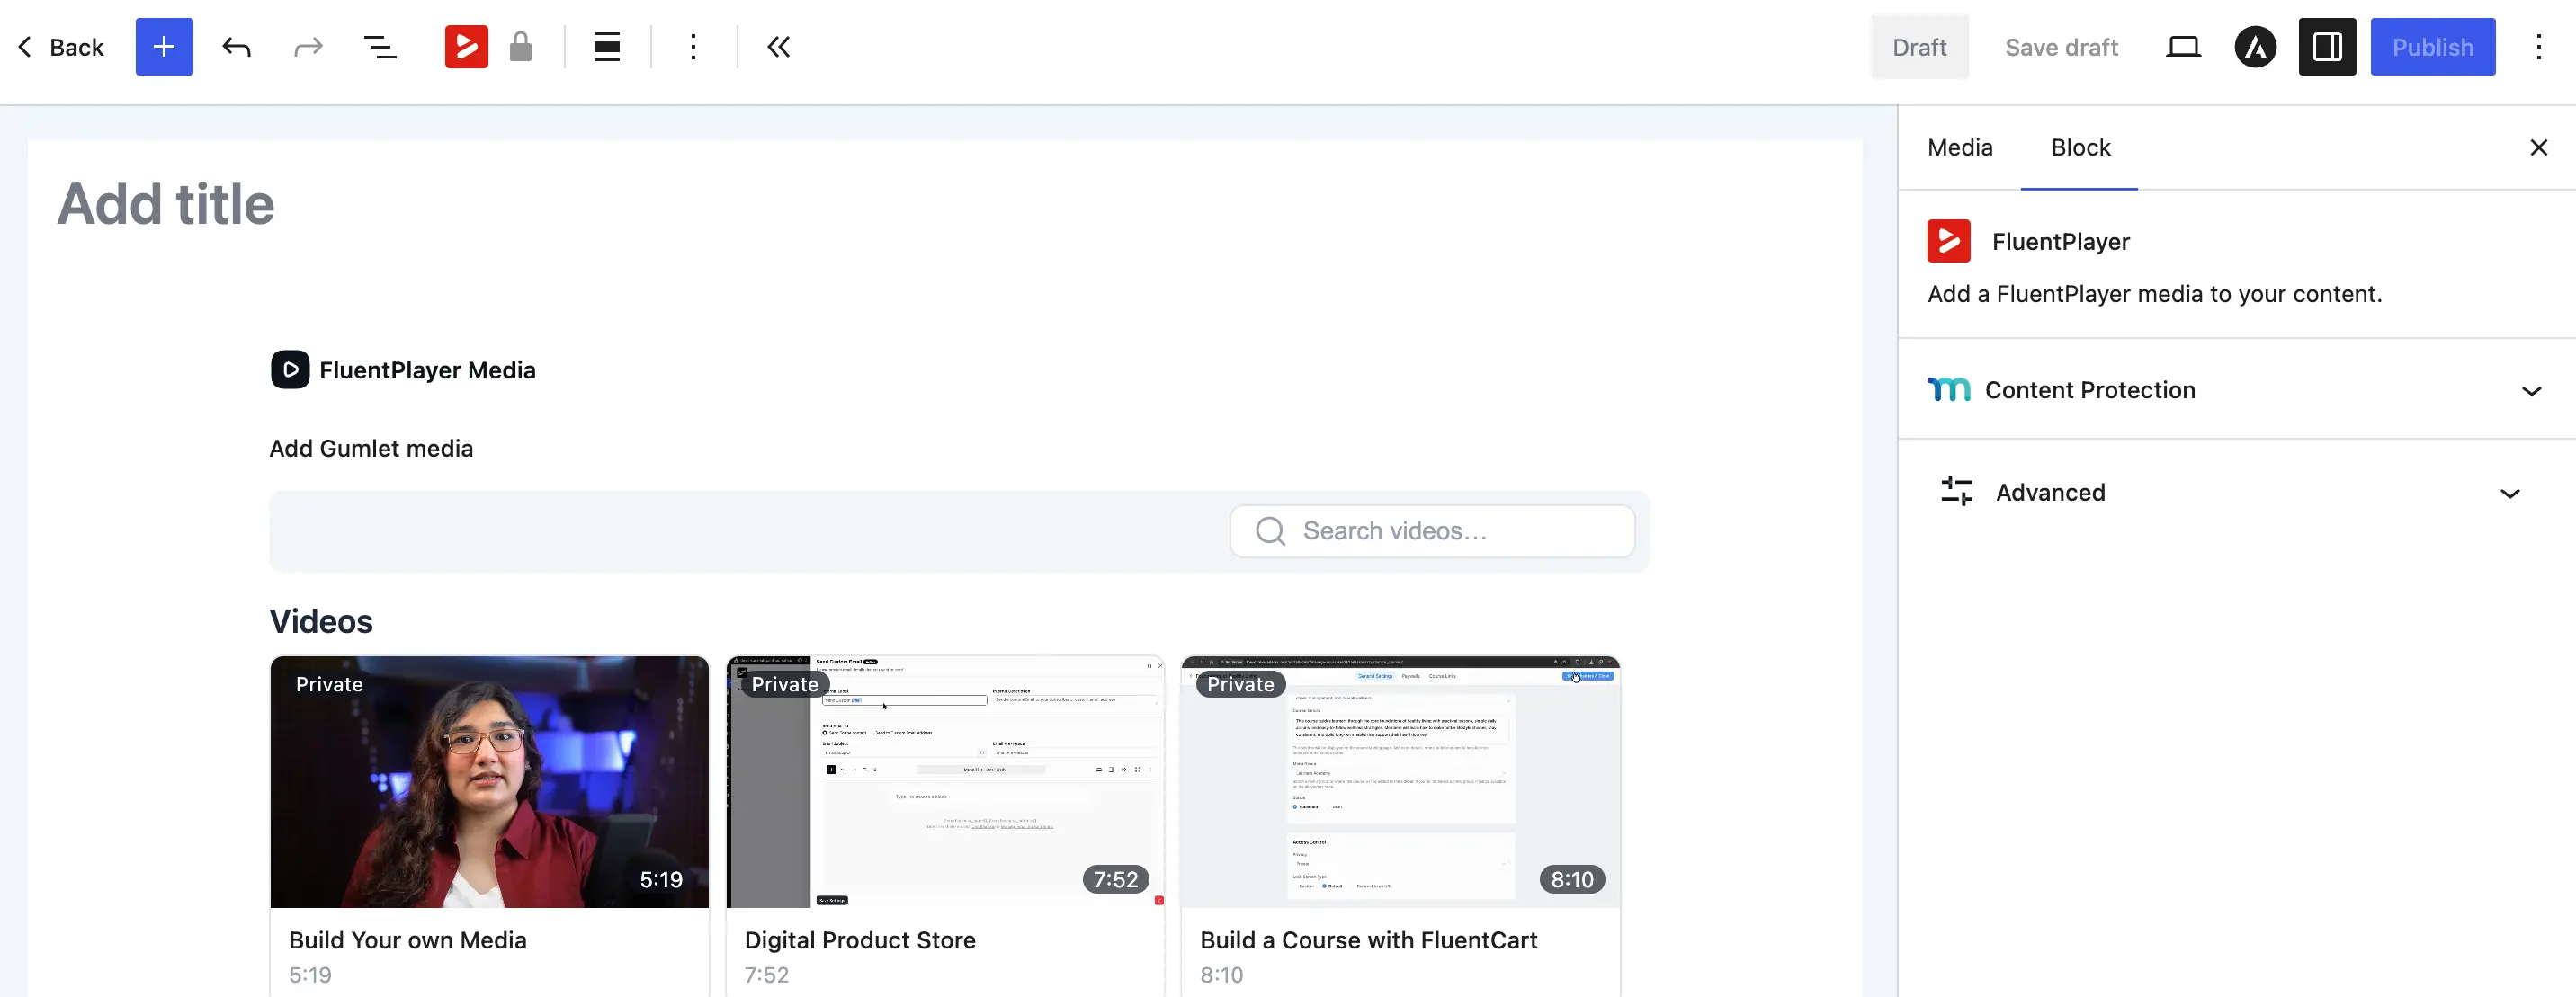
Once connected, select Gumlet assets when adding media:
- Go to FluentPlayer → Media and click Add Media.
- Under Source Type, select Gumlet.
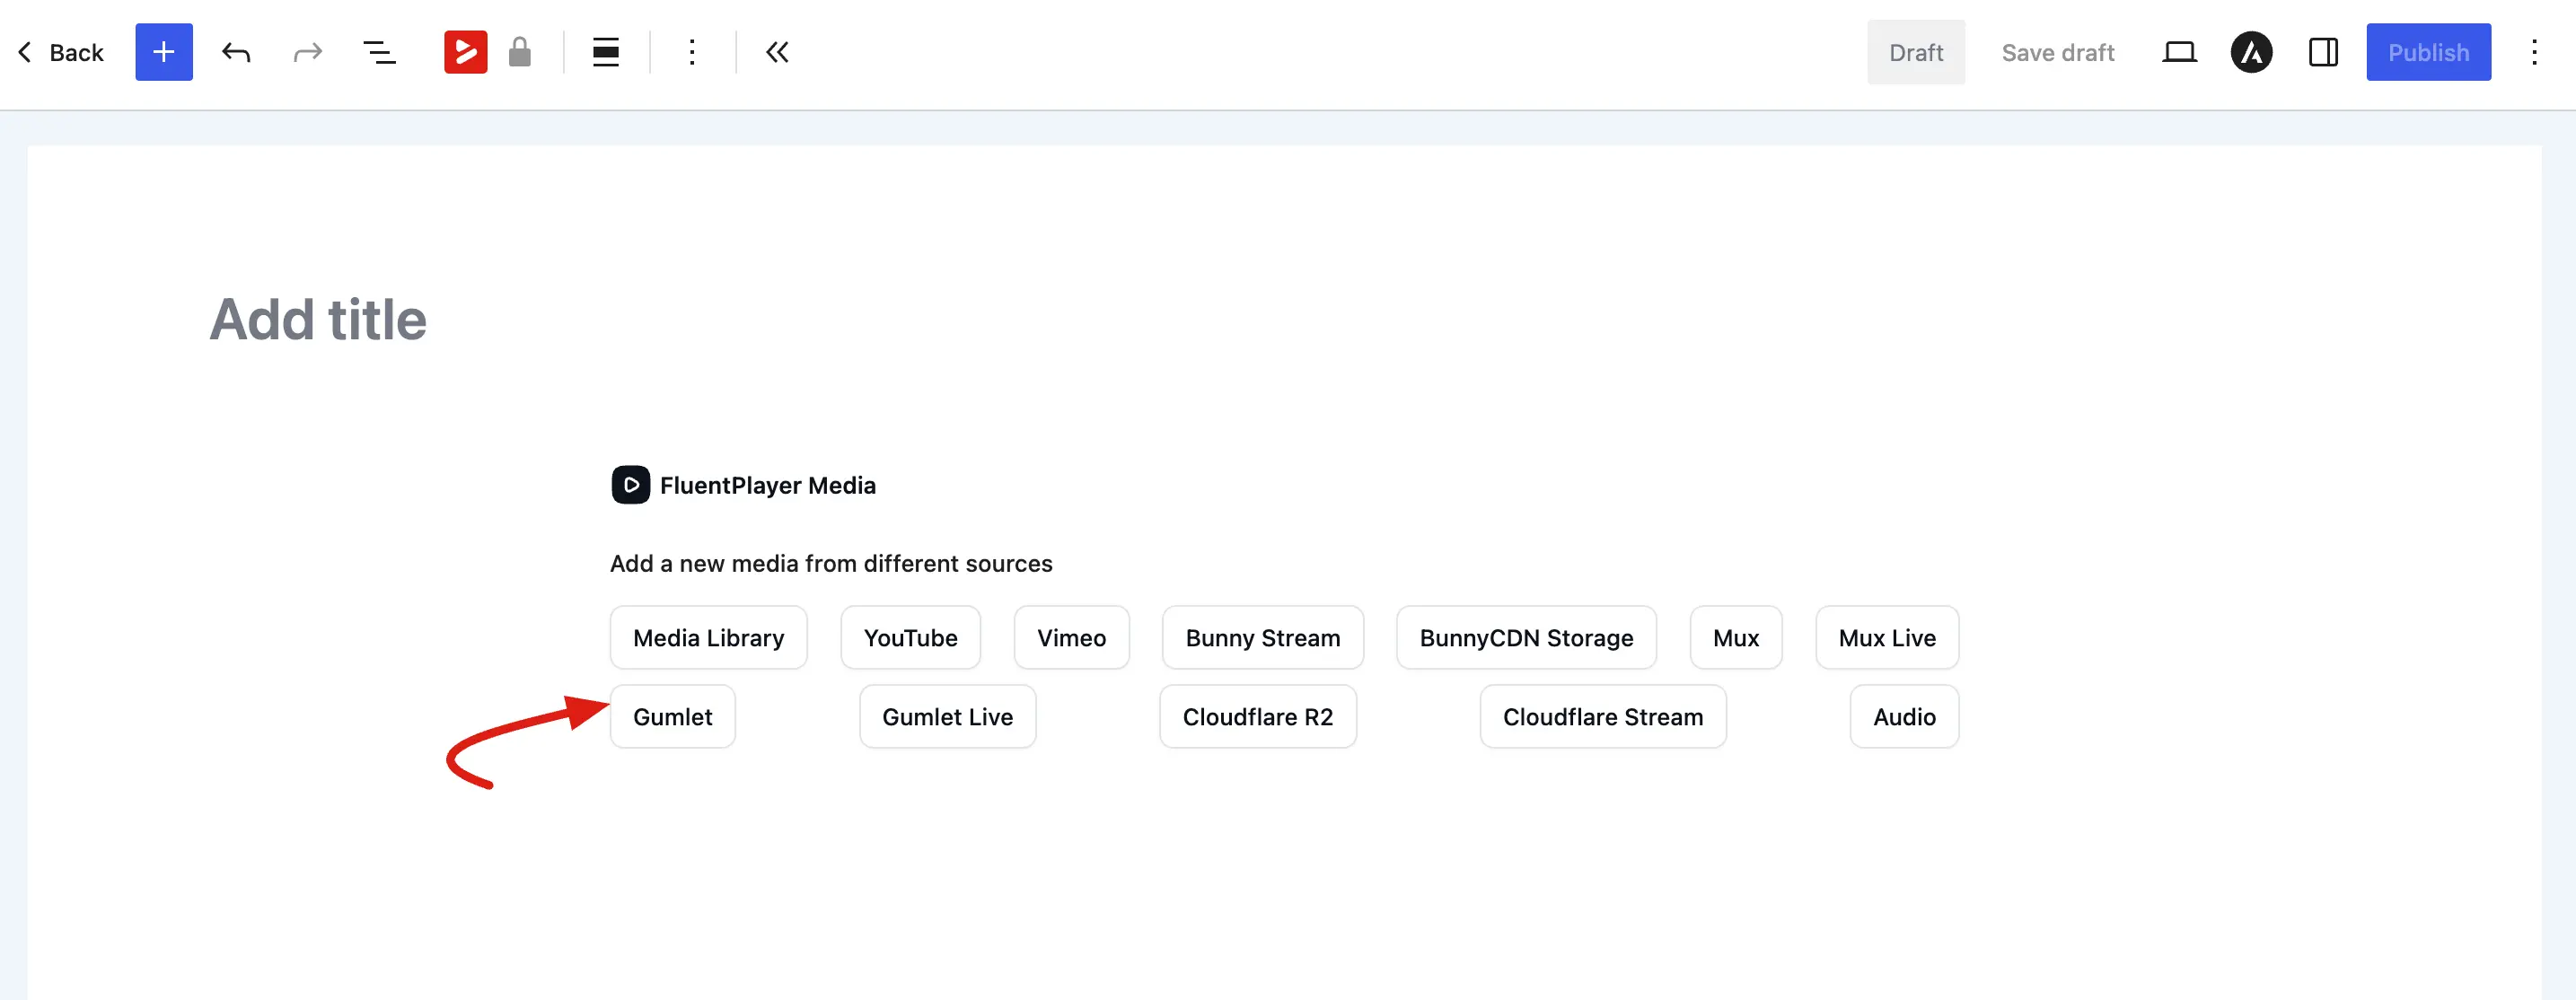
- Browse your Gumlet collection and select the video you want to use.
- Publish the media item to generate a shortcode or use it in the Gutenberg block.
Keep Keys Secure
Your Gumlet API Key and Signing Secret grant full administrative access to your video resources. Never share them publicly or embed them in front-end code.