Appearance
Mailchimp Integration (Pro)
The Mailchimp integration allows you to automatically add viewers to a Mailchimp audience the moment they submit their email through your video's email capture. No third-party connector or custom code is needed. FluentPlayer connects directly to the Mailchimp API.
You can target a specific audience, apply tags, and control this per video so different videos can feed different lists or segments.
Pro feature
Mailchimp integration requires FluentPlayer Pro. The Pro plugin depends on the free FluentPlayer plugin. Keep both active.
How It Works
When a viewer submits their email through the email gate:
- FluentPlayer stores the submission and triggers the email provider.
- The Mailchimp provider fetches the audience ID and tags from the preset.
- A request is sent to the Mailchimp API to add or update the contact.
- If the email already exists in the audience, the record is updated no duplicates are created.
- Any configured tags are applied to the contact in the same step.
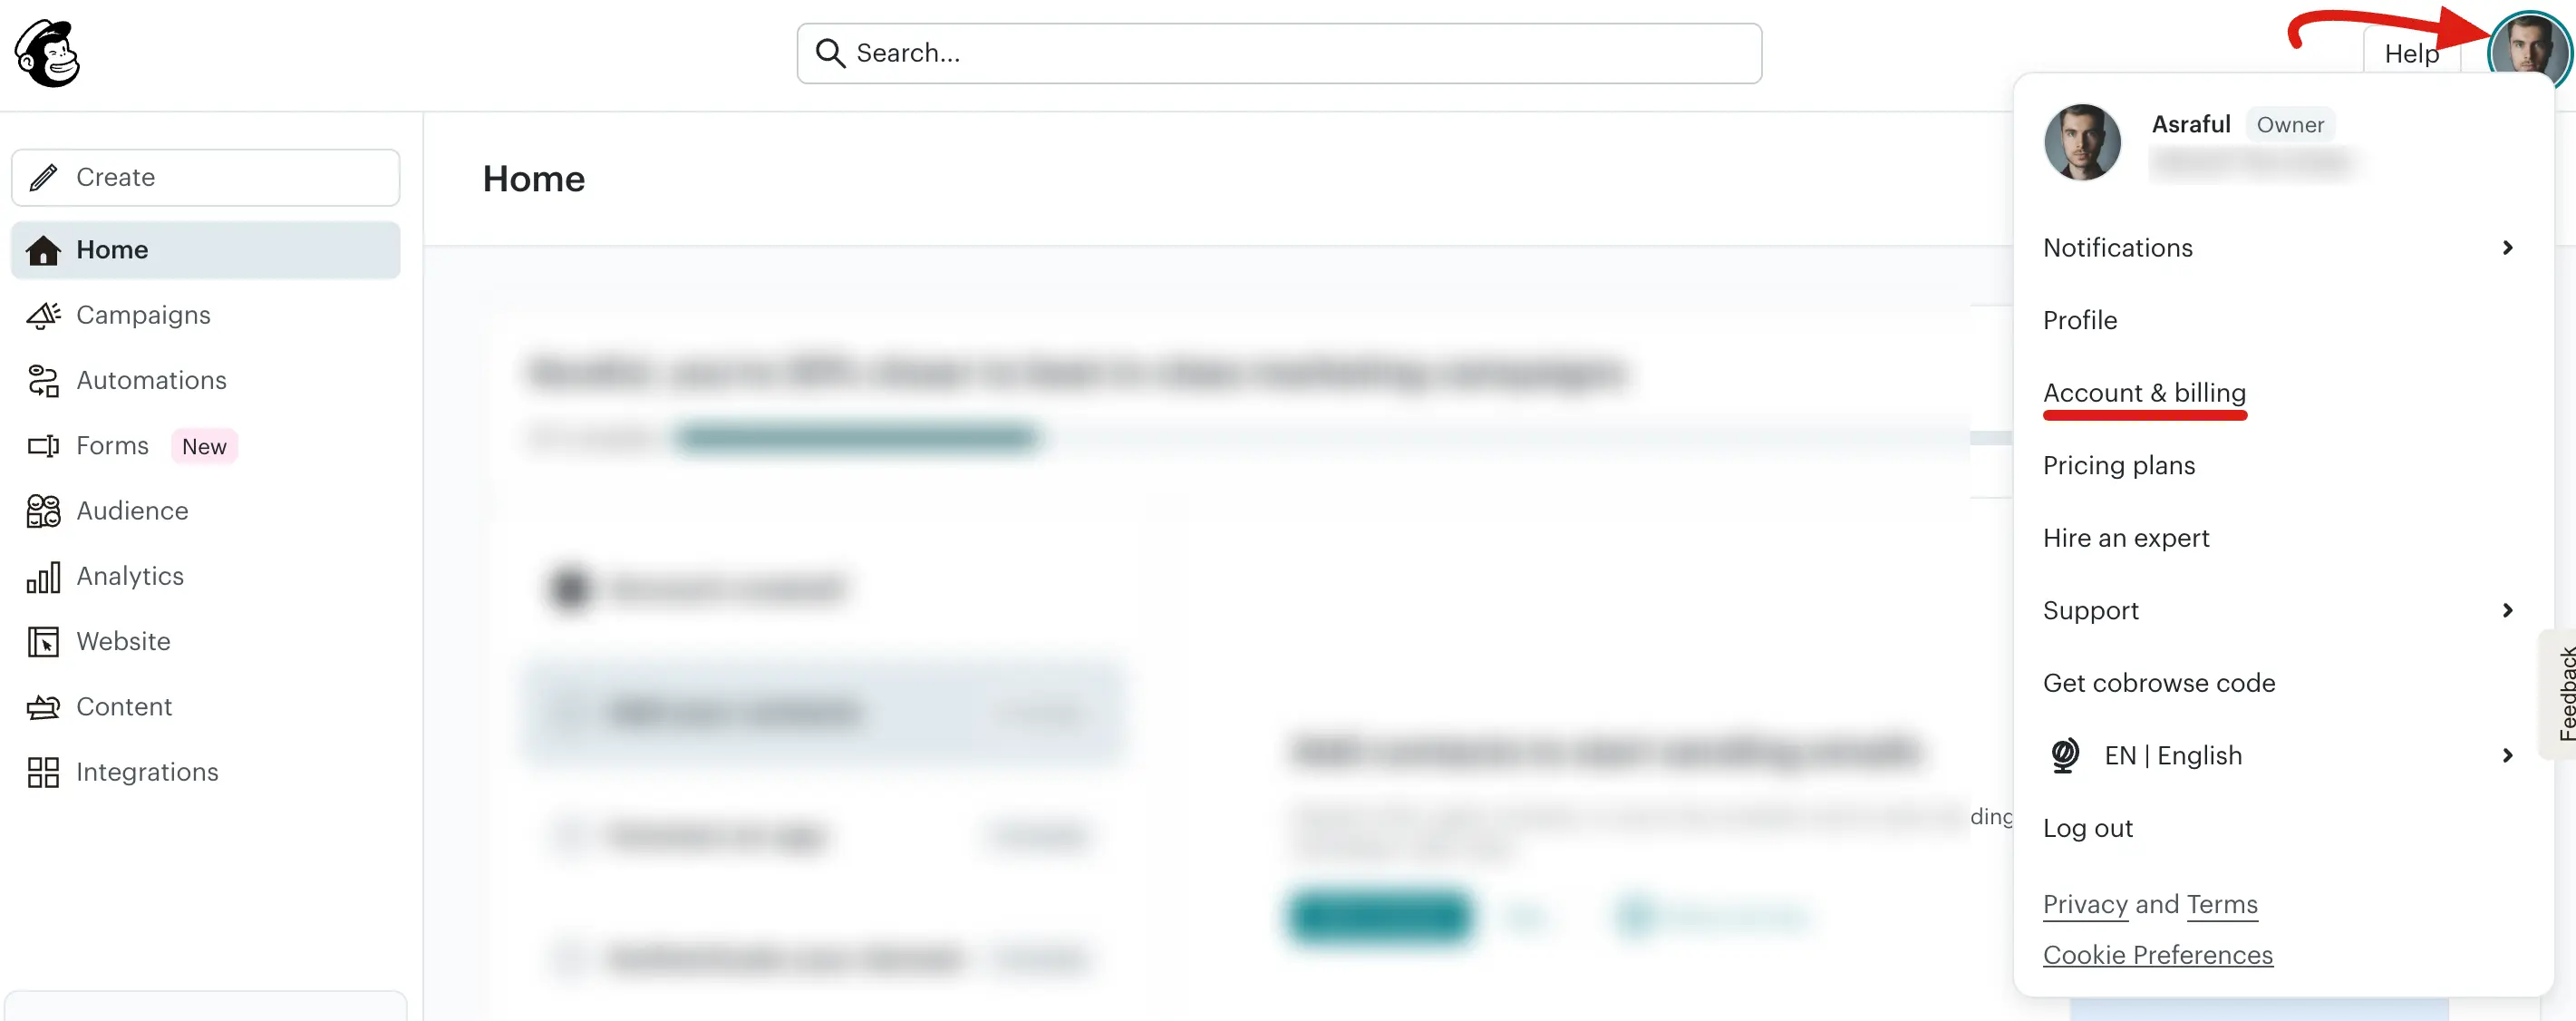
Step 1: Get Your Mailchimp API Key
- Log in to your Mailchimp account.
- Click your profile avatar and go to Account & Billing.
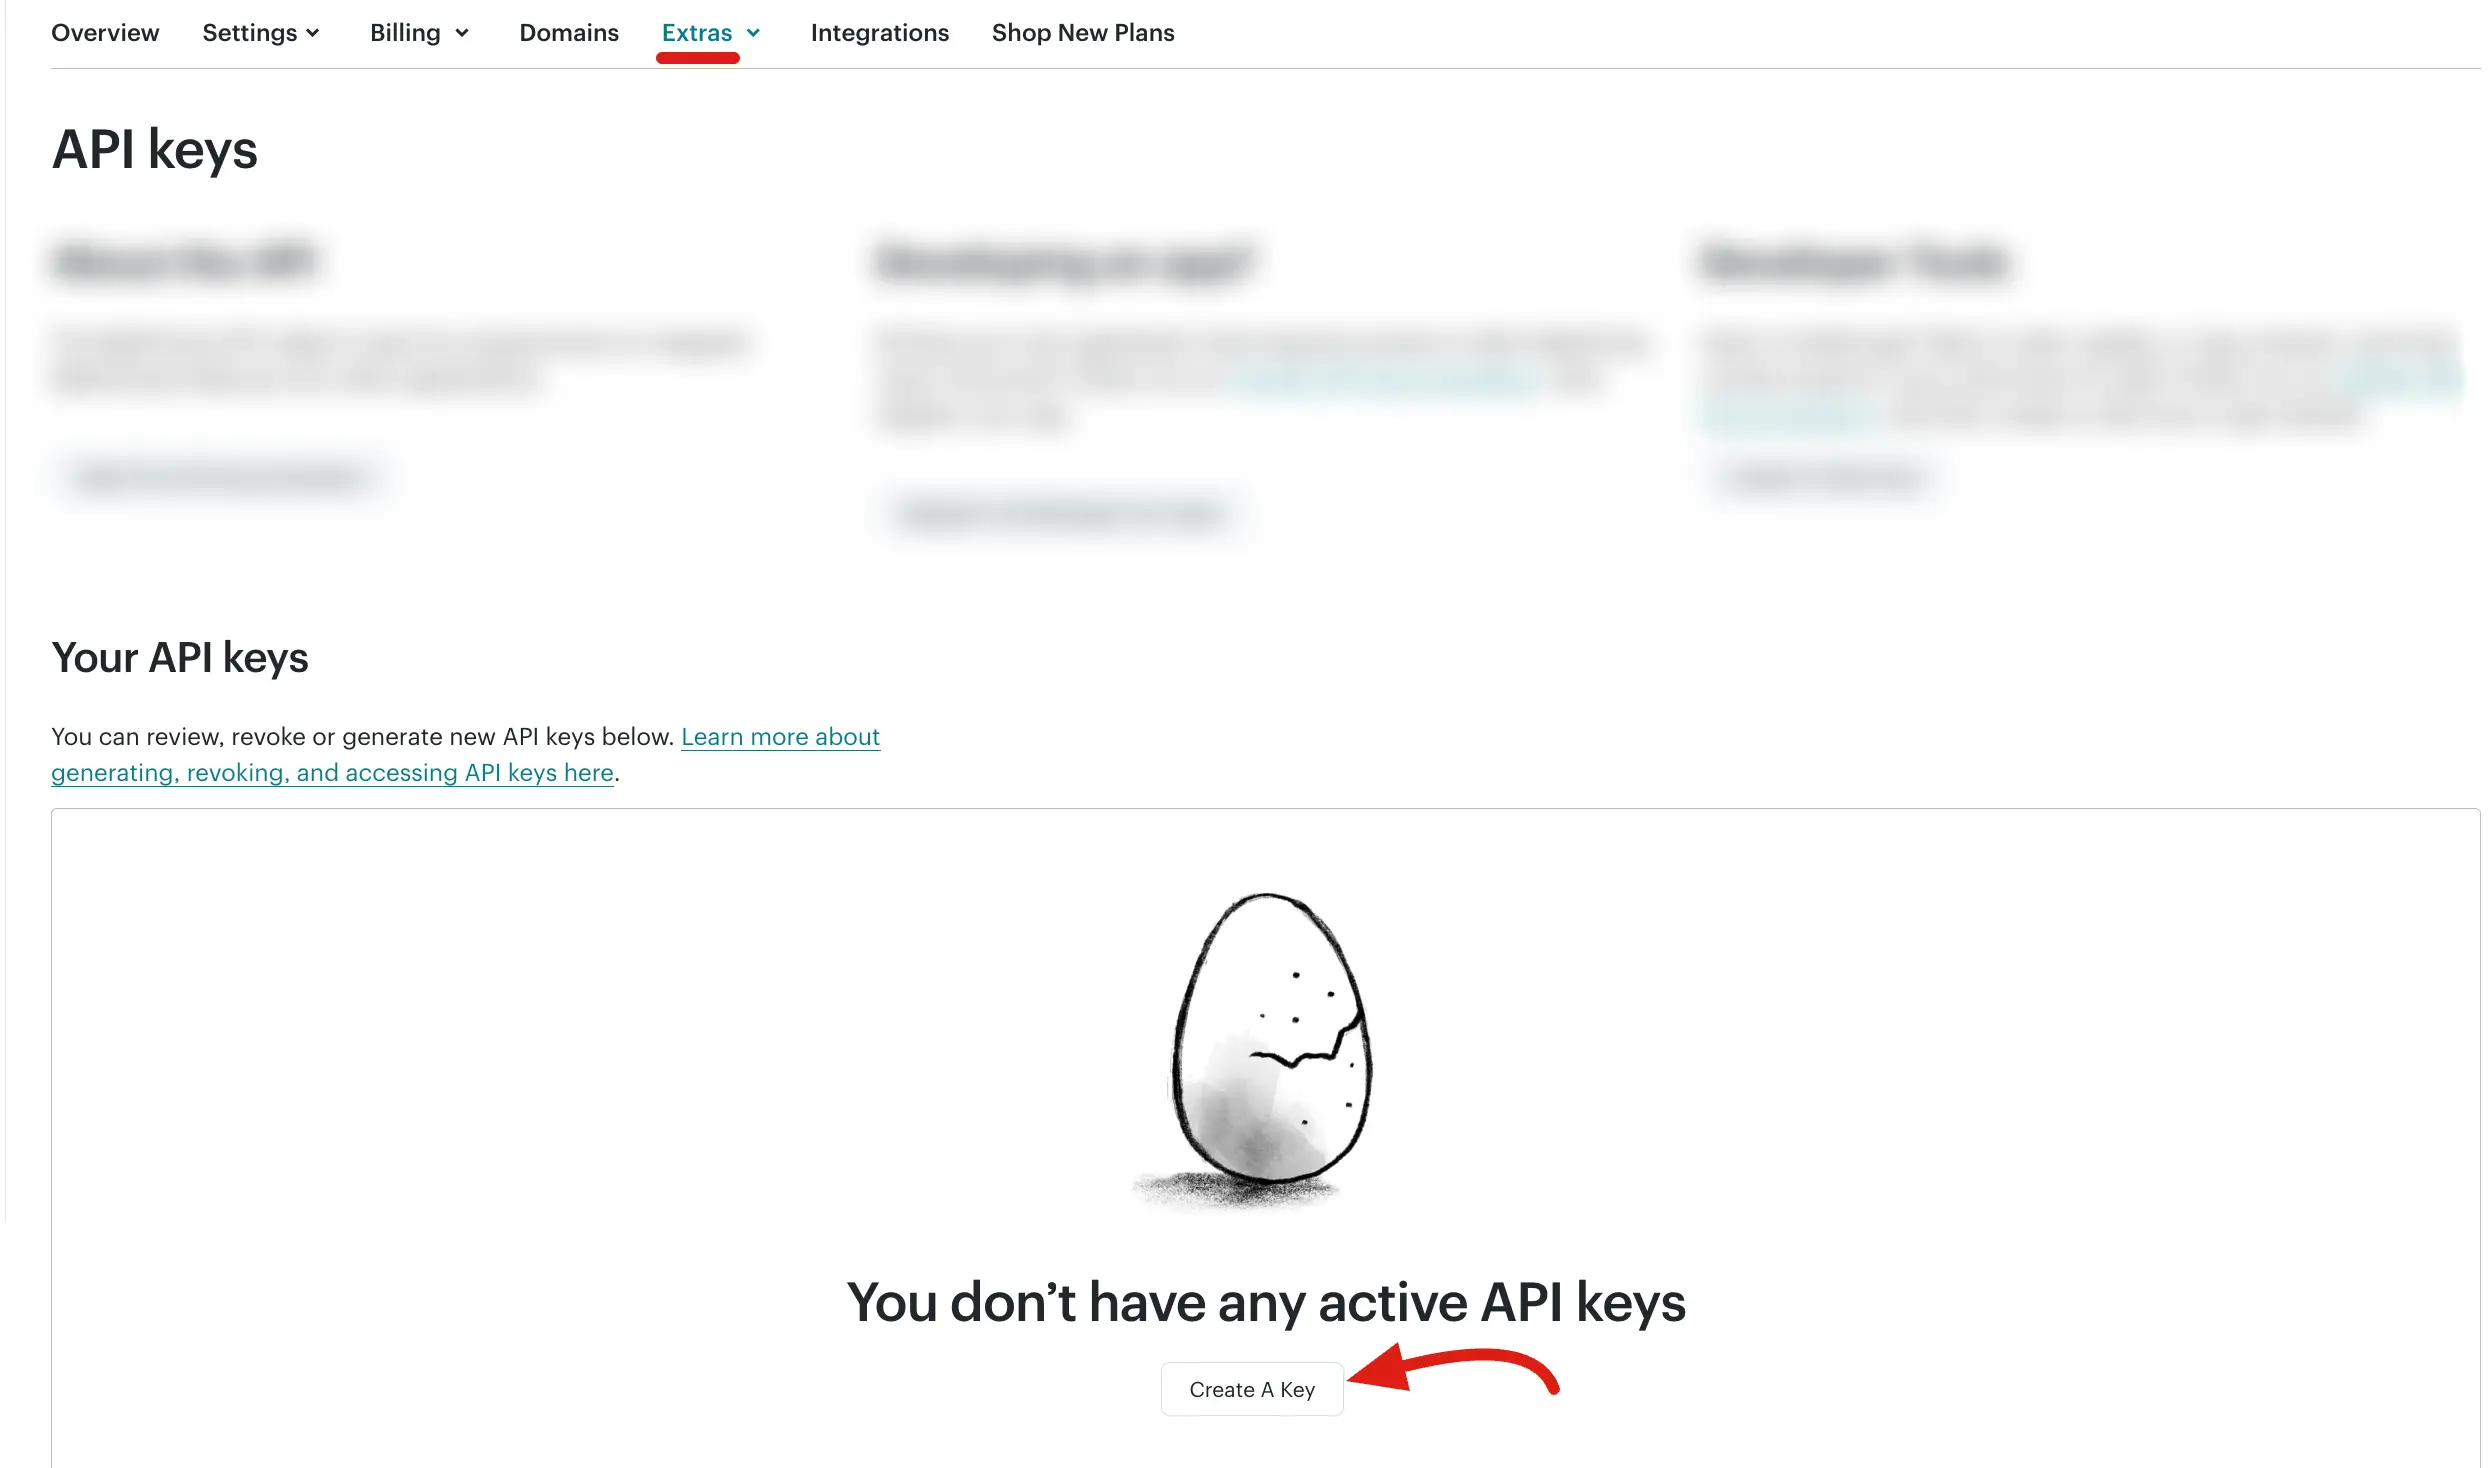
- Navigate to Extras → API Keys. Then, Click on the Create A Key button.
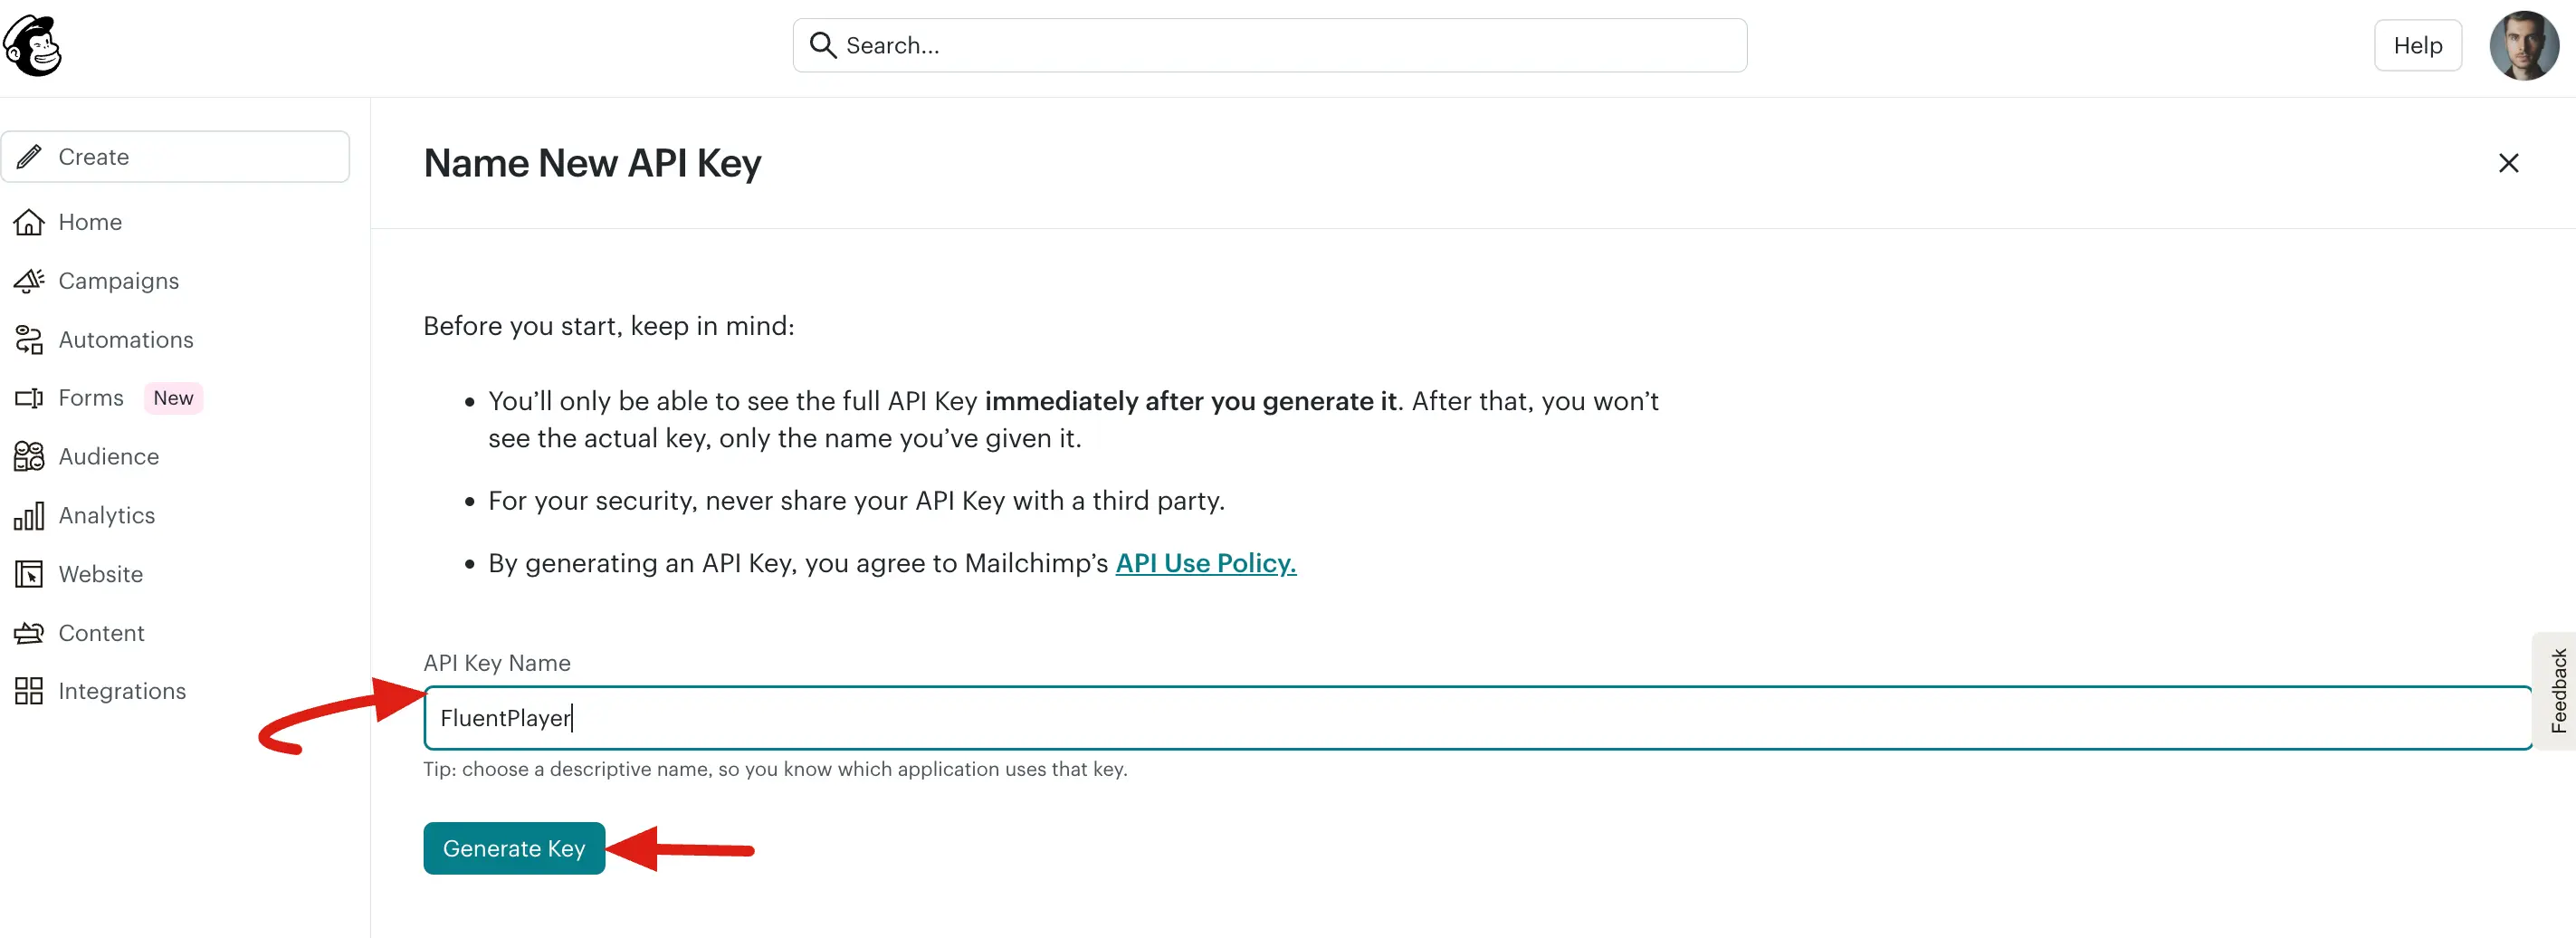
- Now, give it a label (for example,
FluentPlayer), and click on the Generate key button.
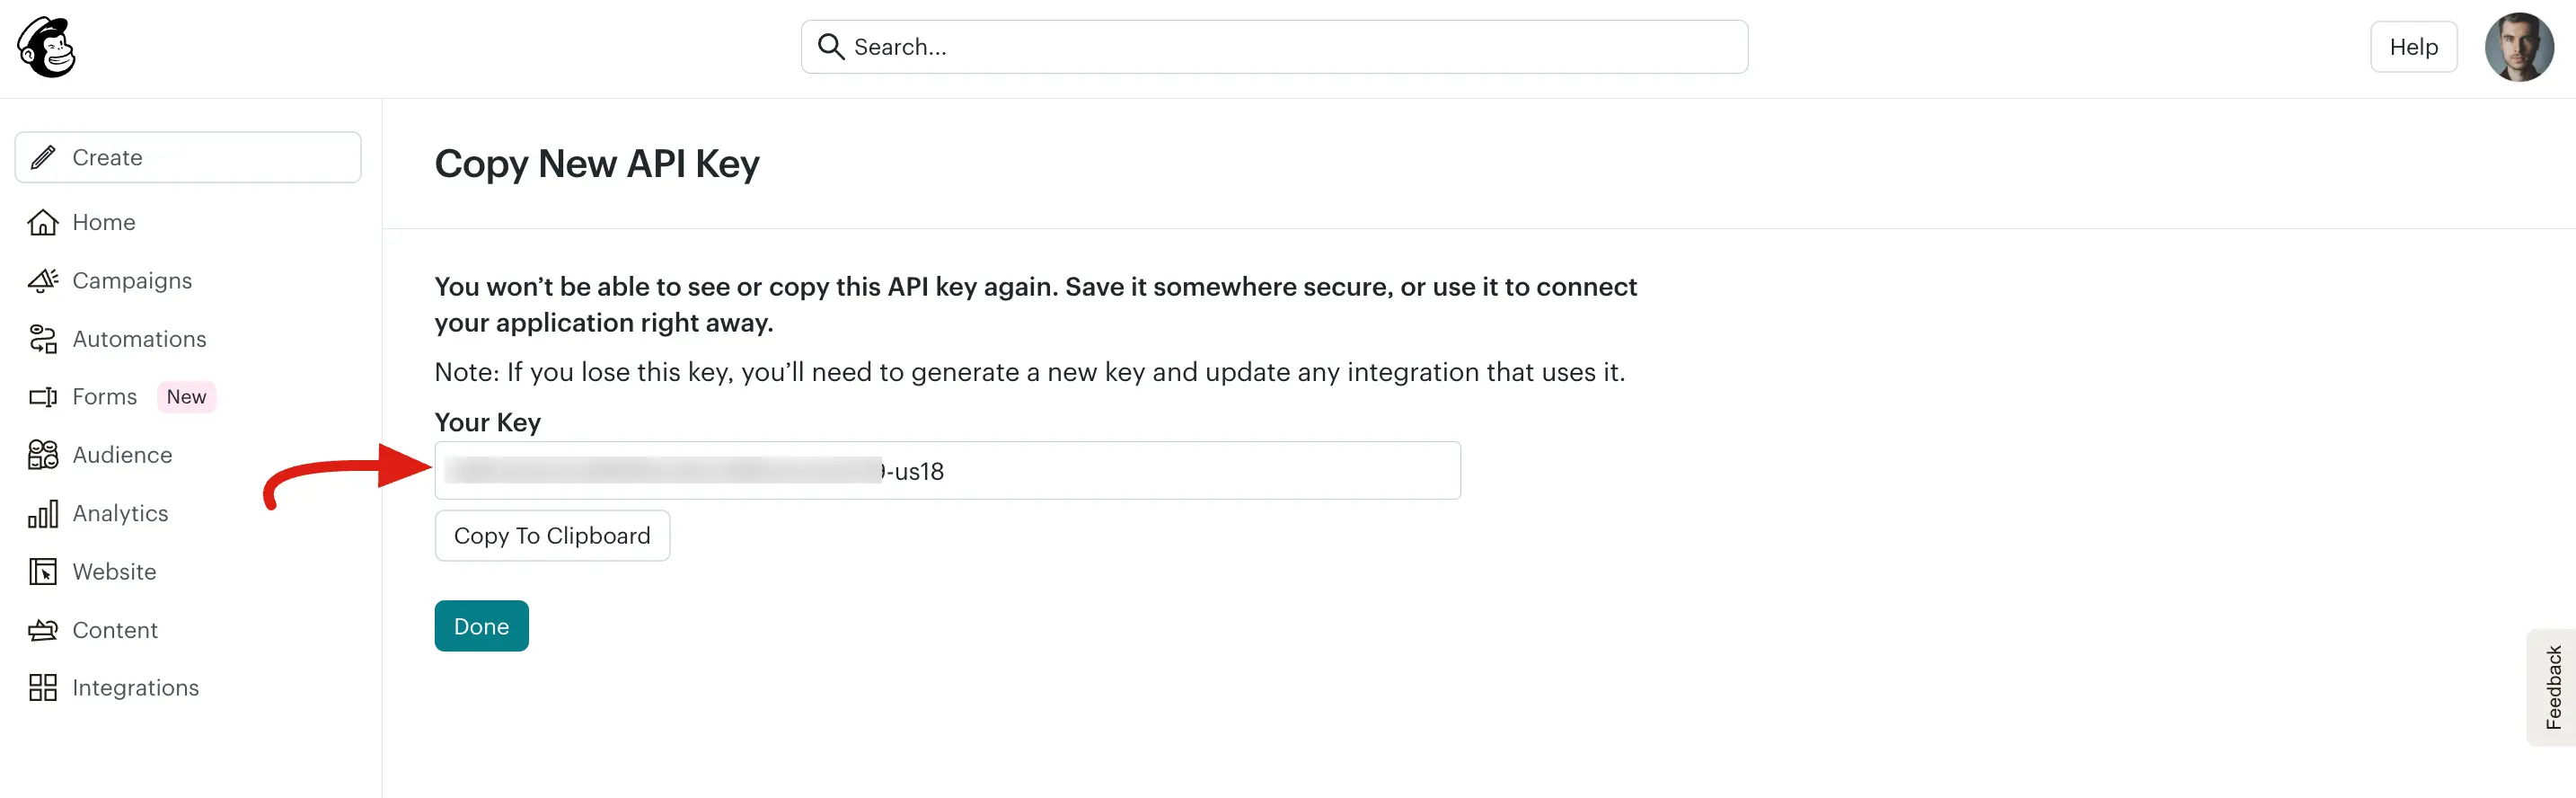
- A popup will appear. Copy the API Key.
INFO
Mailchimp API keys follow the format xxxxxxxxxxxxxxxxxxxxxxxxxxxxxxxx-us18. The suffix (for example, -us18) is your data center; the plugin uses it automatically.
Step 2: Connect Mailchimp in FluentPlayer
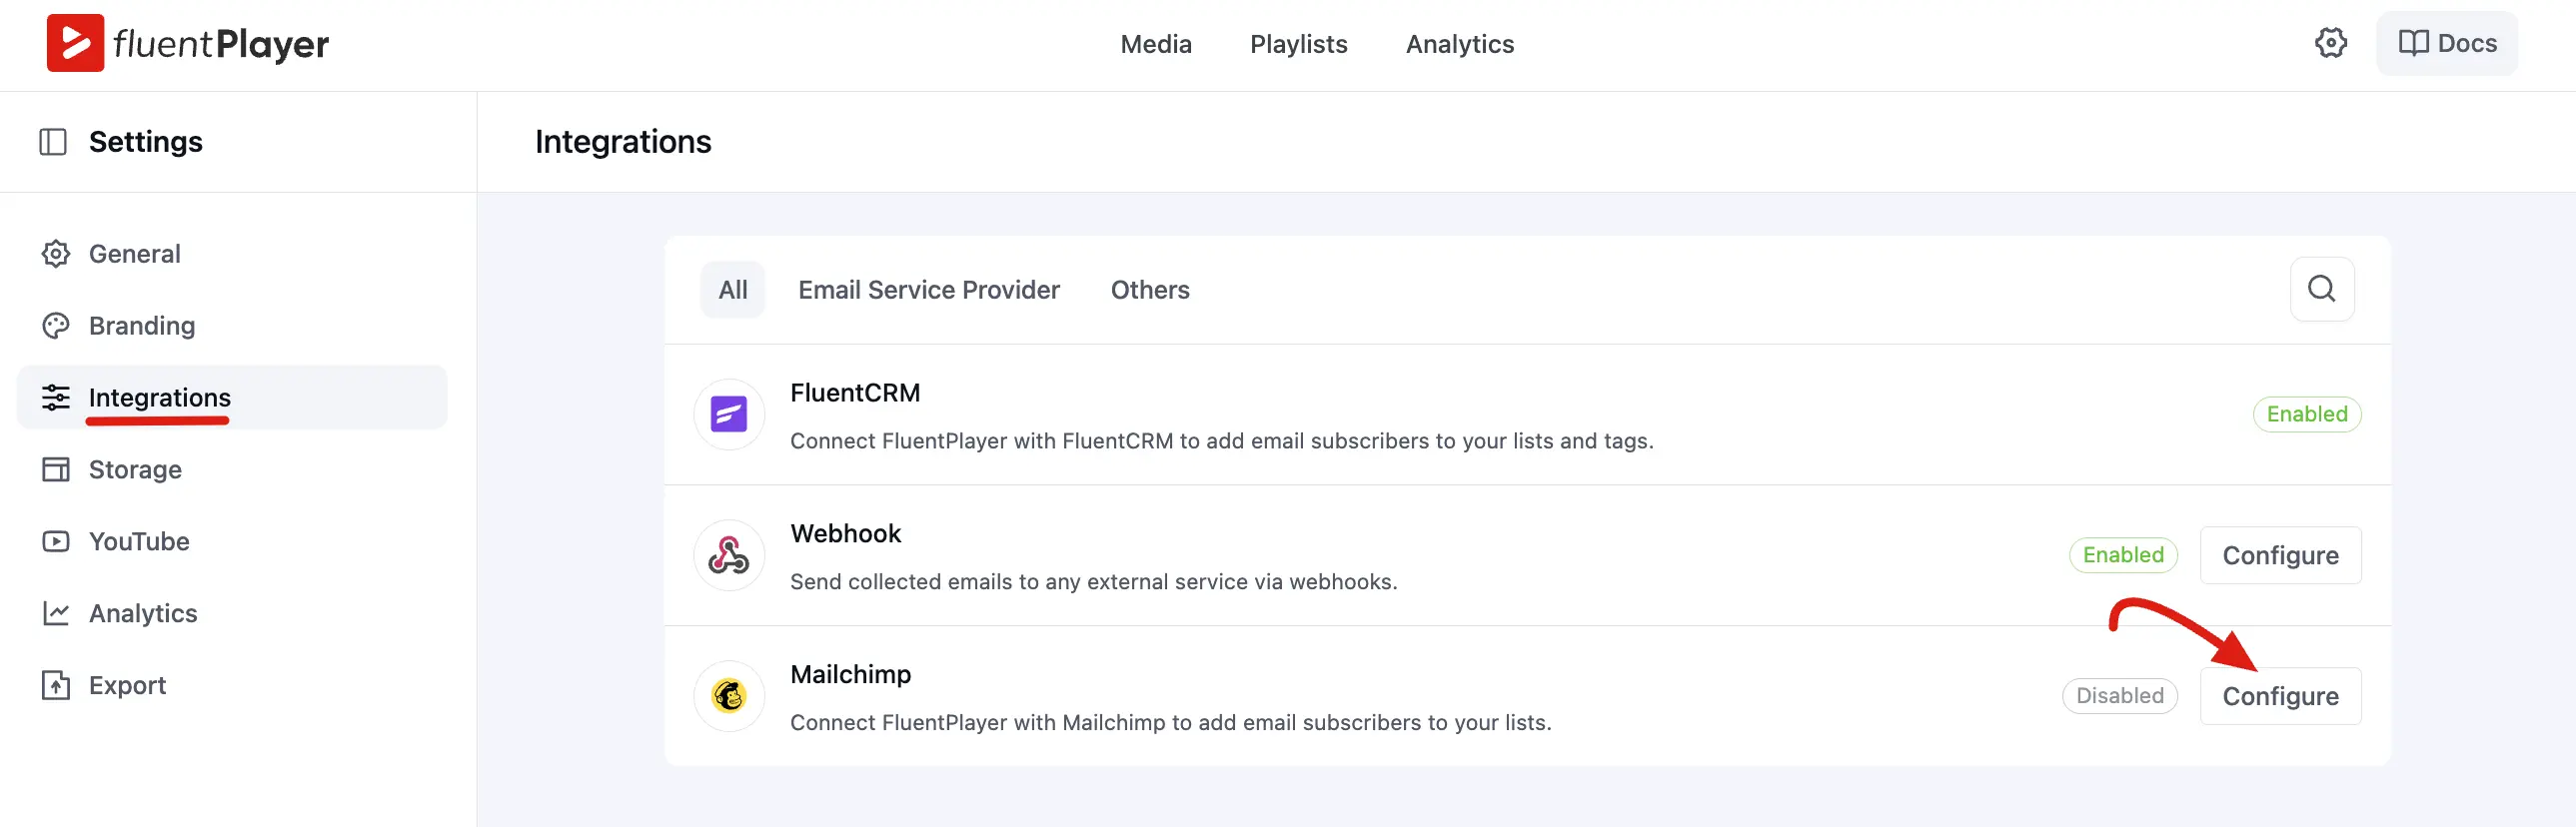
- In your WordPress dashboard, go to FluentPlayer → Settings.
- Open the Integrations tab.
- Find the Mailchimp and click Configure.
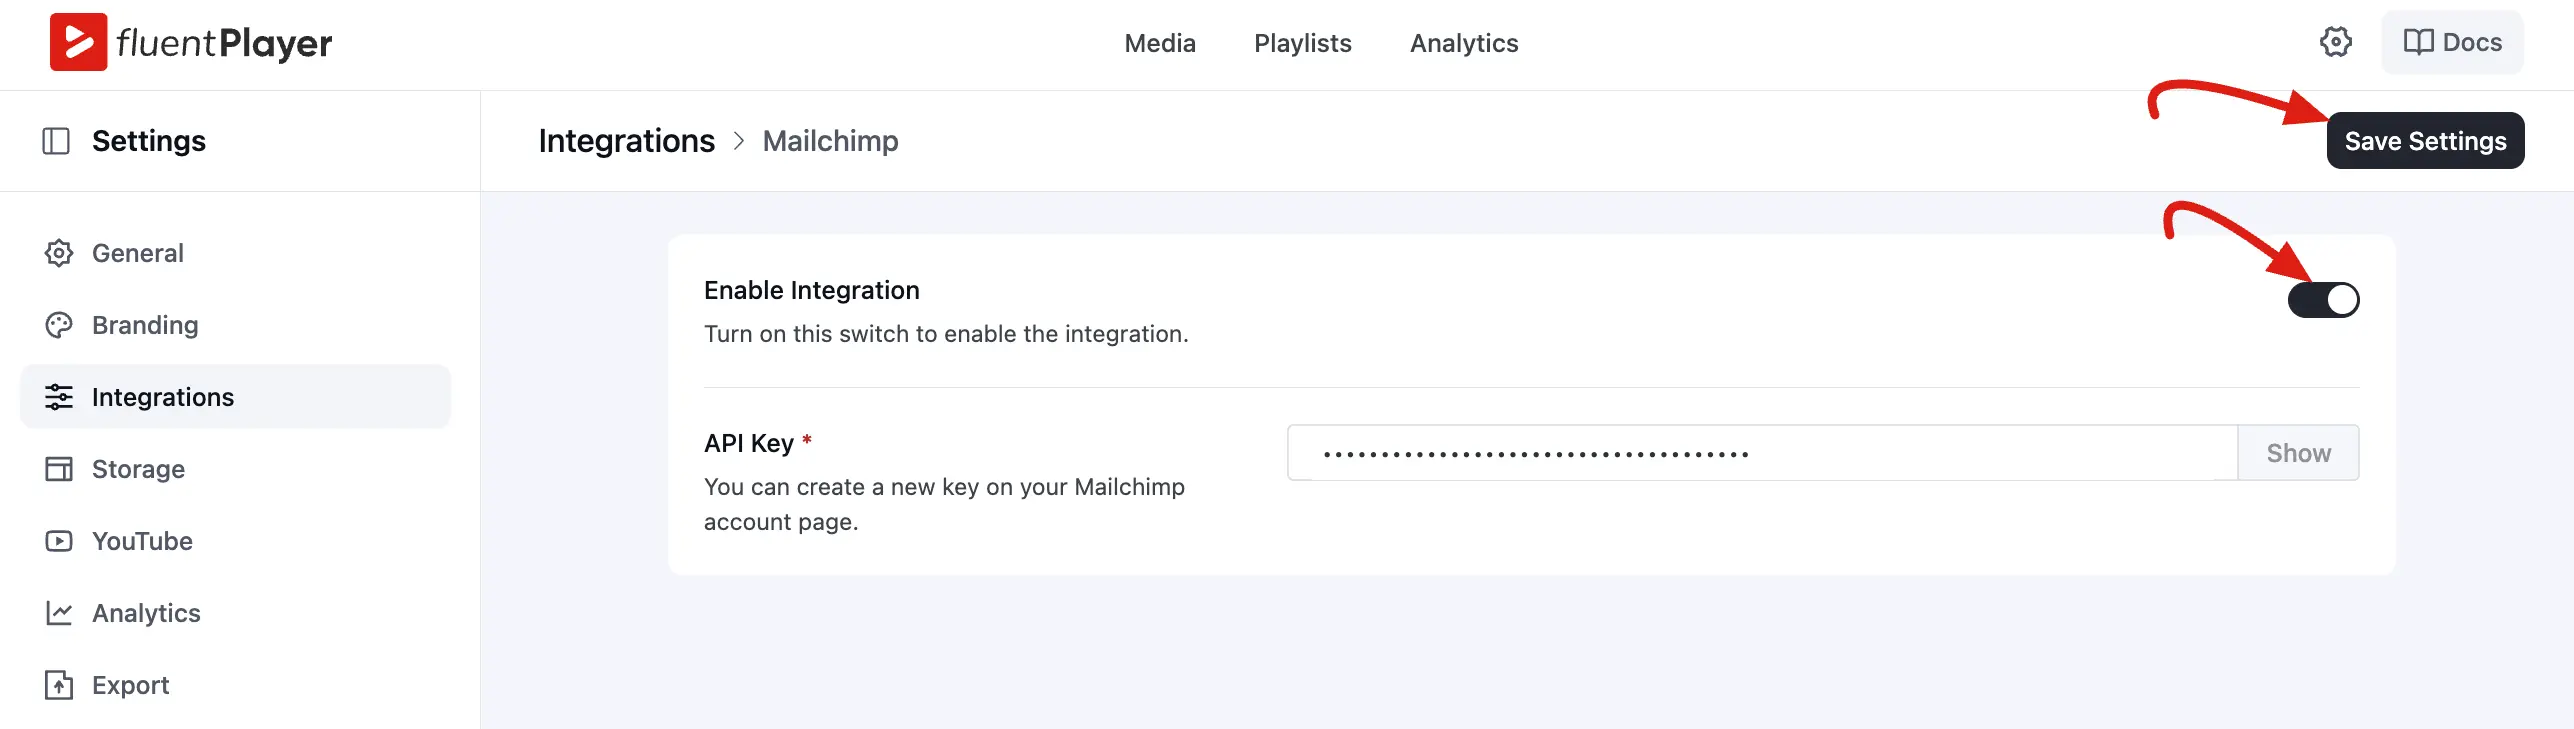
- Toggle (on) the Enable Integration option. Paste your API key into the API Key field.
- Click Save Settings. The plugin will validate the key automatically.
If validation fails, confirm you copied the full key including the -us18 suffix and that it has not been revoked in your Mailchimp account.
Step 3: Assign Mailchimp to a Video
Once your API key is saved:
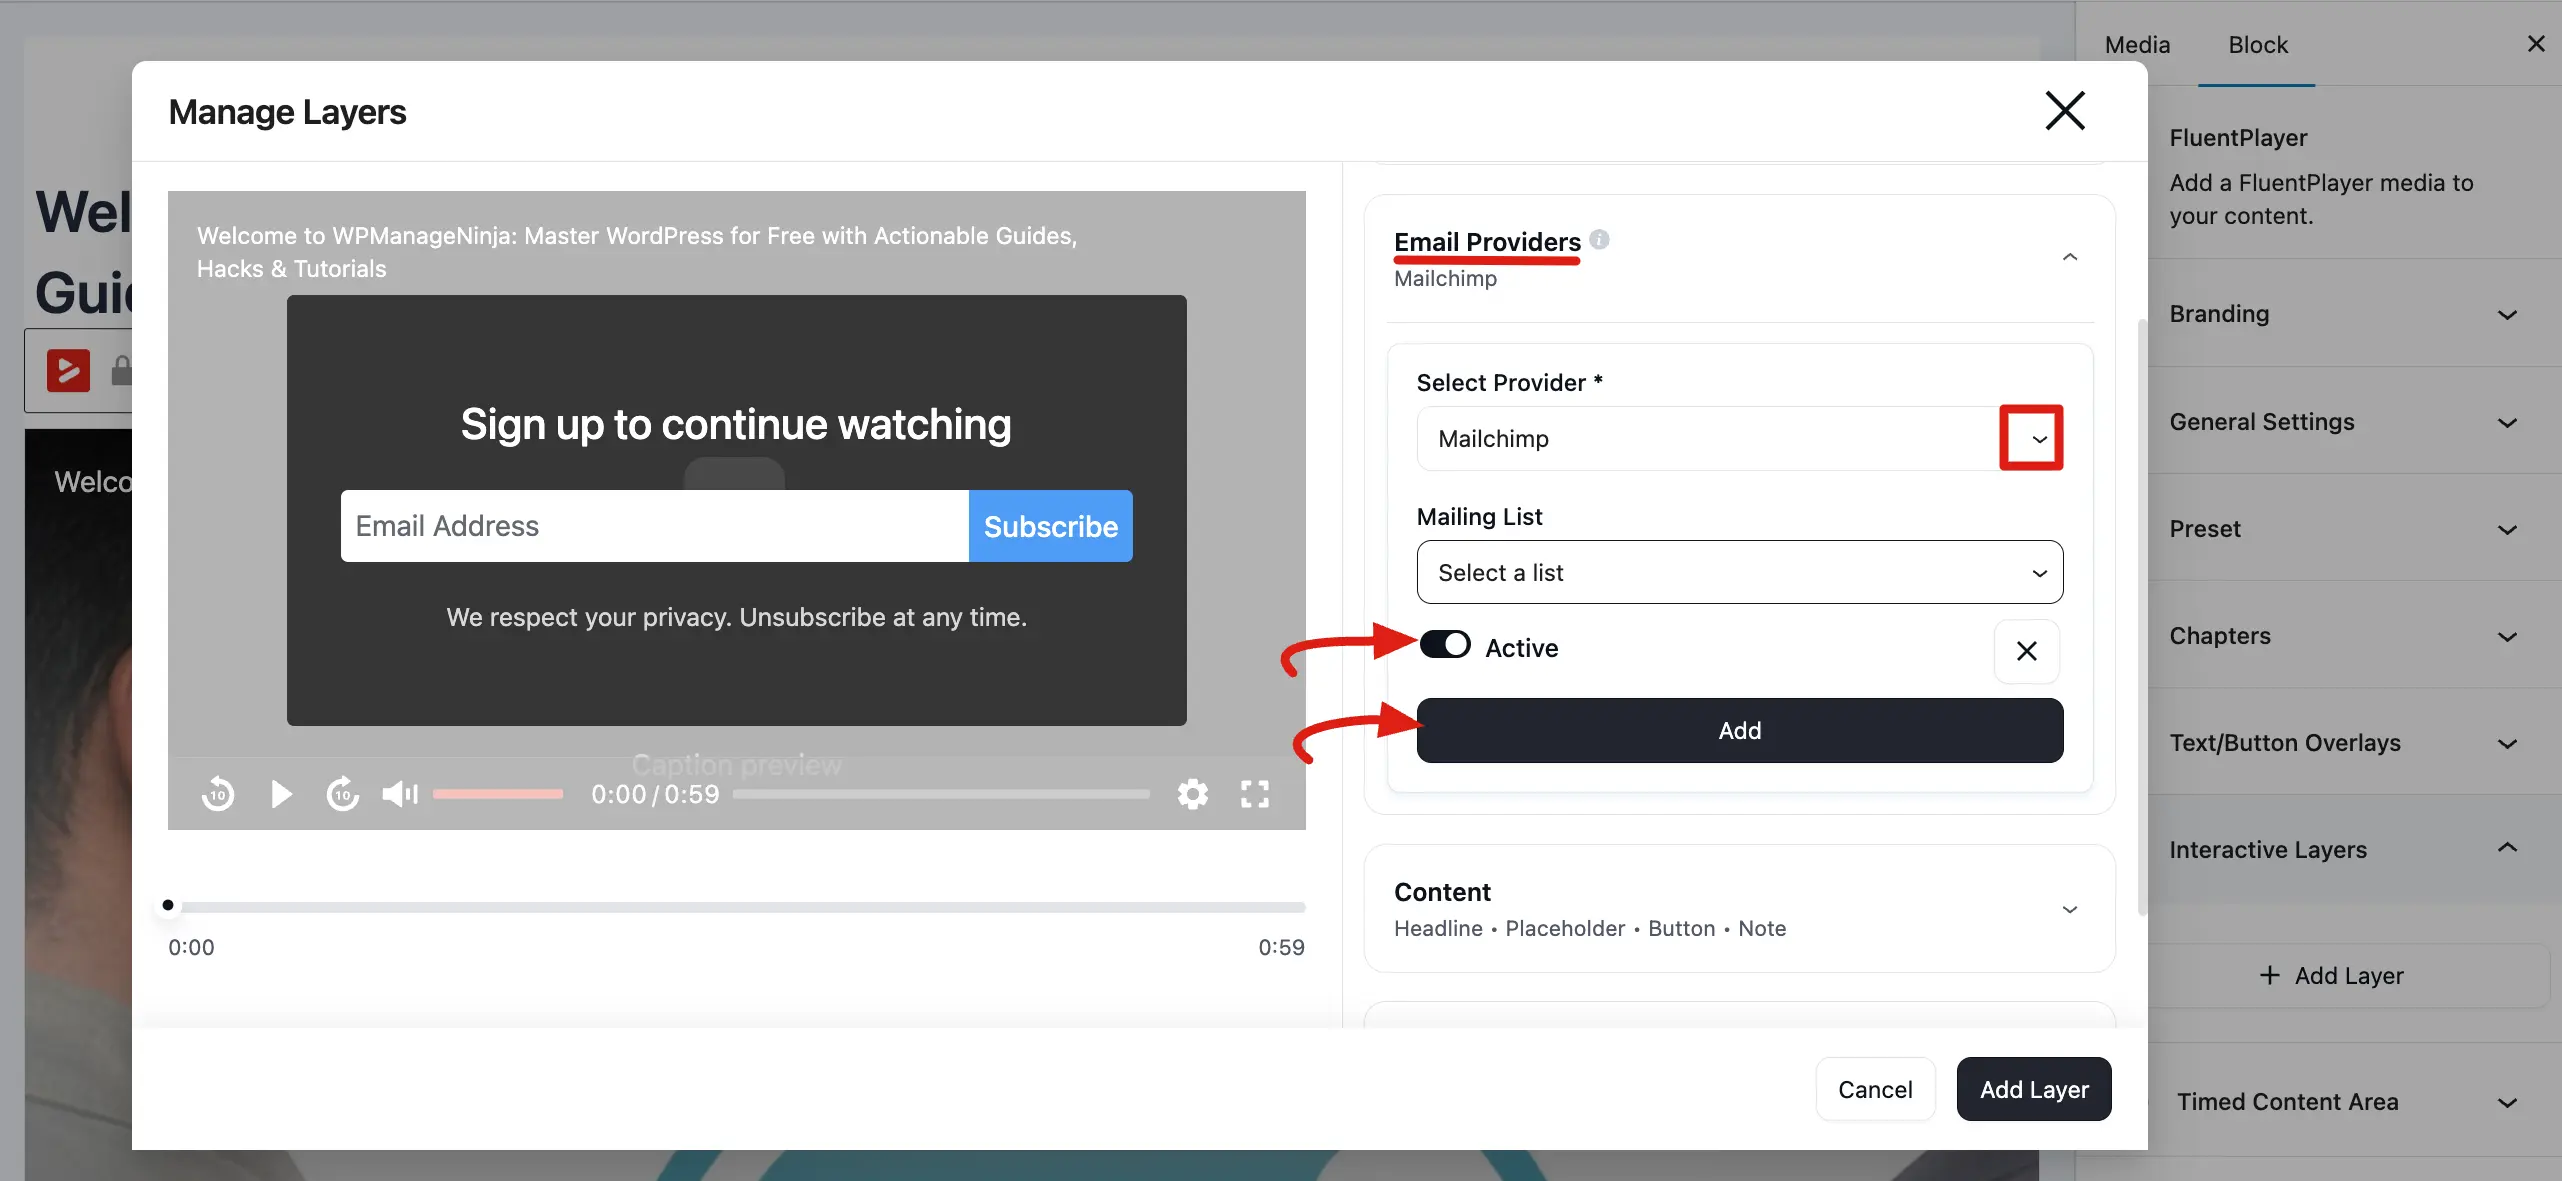
- Open any media item in FluentPlayer → Media.
- Go to the Email Capture / Email Provider settings.
- Select Mailchimp as the provider.
- Choose the Mailing List (audience) from the dropdown; it loads directly from your Mailchimp account.
- Optionally, add Tags (comma separated).
- Save the media.
If the Mailing List dropdown is empty, return to Settings and confirm your API key is valid and saved.
Configuration Fields
| Field | Required | Description |
|---|---|---|
| API Key | Yes | Your Mailchimp API key. Entered once in global settings and shared across all videos. |
| Mailing List | Yes | The Mailchimp audience to subscribe the viewer to. Set per video. |
| Tags | No | Comma separated tag names to apply to the subscriber (for example, webinar, vip). Created automatically in Mailchimp if they don't exist. |
Tags
Tags allows you to segment subscribers and trigger automations based on which video they engaged with.
Enter tags in the Tags field as a comma separated list:
webinar-attendee, product-demo, q2-campaign- Tags are created automatically in Mailchimp if they don't already exist.
- If the contact already exists, new tags are added existing tags are not removed.
- Different videos can have different tags, so you can track exactly where each subscriber came from.
Subscriber and Duplicate Handling
FluentPlayer uses Mailchimp's upsert pattern when adding contacts:
- New contact: Added to the audience as
subscribed. - Existing contact: Record is updated and new tags are merged, no duplicate is created.
INFO
FluentPlayer always sets the subscriber status to subscribed, which bypasses the double opt-in step at the API level. If your Mailchimp audience has double opt-in enabled at the account level, Mailchimp may still send a confirmation email. This is controlled by your Mailchimp settings, not the plugin.
Troubleshooting
| Problem | Likely reason | What to do |
|---|---|---|
| API key validation fails | Incomplete or revoked key | Re-copy the full key including the -us18 suffix |
| Mailing List dropdown is empty | No audiences in Mailchimp, or API key has no list permissions | Log in to Mailchimp and confirm an audience exists; regenerate the API key with full permissions |
| Contact not appearing in Mailchimp | Provider not enabled or preset not saved | Confirm Mailchimp is the selected provider and re save the media |
| Tags not applied | Tags typed incorrectly or API error | Check for special characters; enable WP_DEBUG and review debug.log |
| Subscriber added but no tags | Tag request failed after successful subscribe | Partial success. Check debug log for tag specific error |
Frequently Asked Questions
Can I use a different audience for each video? Yes. The mailing list is selected per video preset, so different videos can feed different audiences.
Will subscribers get a double opt-in email? FluentPlayer sets the status to subscribed at the API level, which bypasses double opt-in programmatically. If your Mailchimp audience requires double opt-in at the account level, Mailchimp may still send a confirmation email.
What happens if the same viewer submits their email on two different videos? No duplicate is created. The existing contact is updated and any new tags from the second video are added to their profile.
Do I need a paid Mailchimp plan? No. The Mailchimp API is available on free and paid plans. The plugin works with any Mailchimp plan. Just check API rate limits if you expect high submission volumes.